

WordPress
Follow this straightforward guide to connect your 3DNS domain to your WordPress.com account and upgrade your website with a custom domain.
Connect a 3DNS Domain to WordPress.com
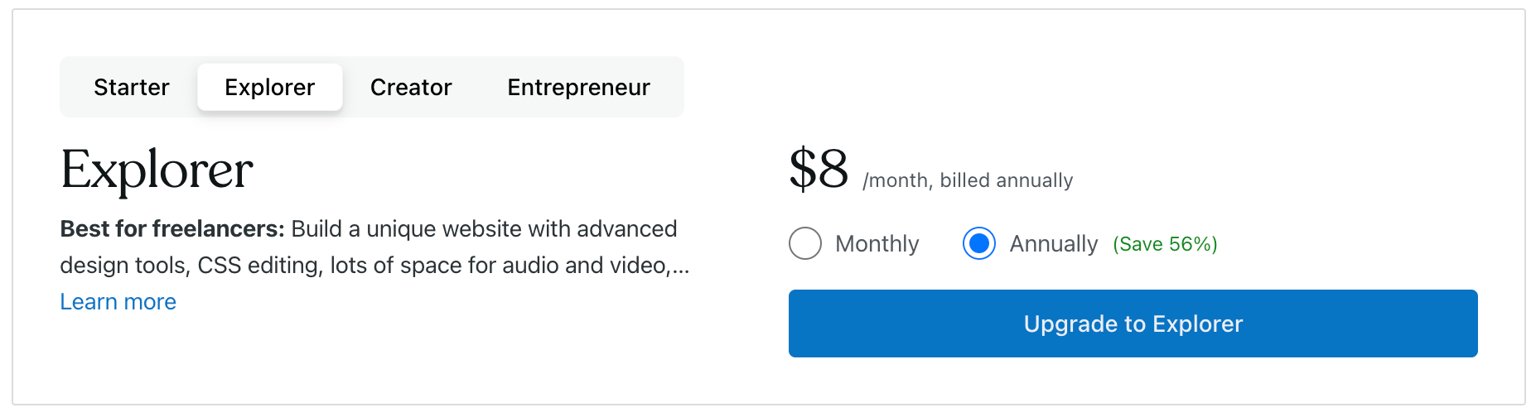
Step 1: If you haven't already, make sure to upgrade your site to be able to add a custom domain
Connecting a domain is free with any paid WordPress.com plan.
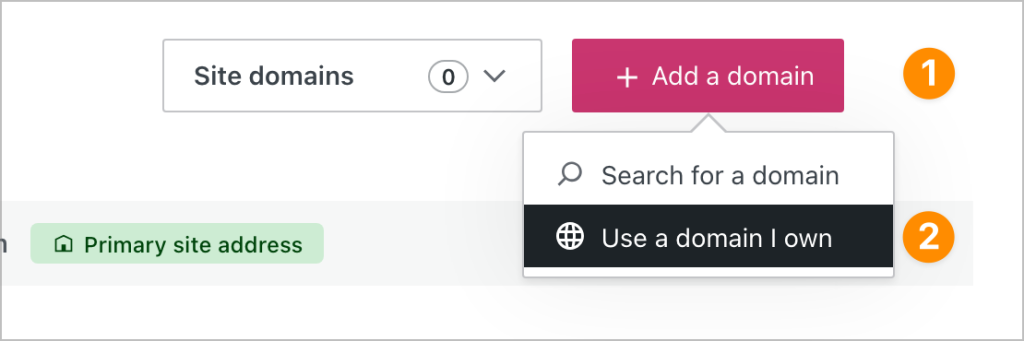
Step 2: Select "Add a domain"
Starting from your site’s dashboard, navigate to Upgrades → Domains (or Hosting → Domains if using WP-Admin) Click the “Add a domain” button in the top-right corner and select “Use a domain I own” from the drop-down menu:
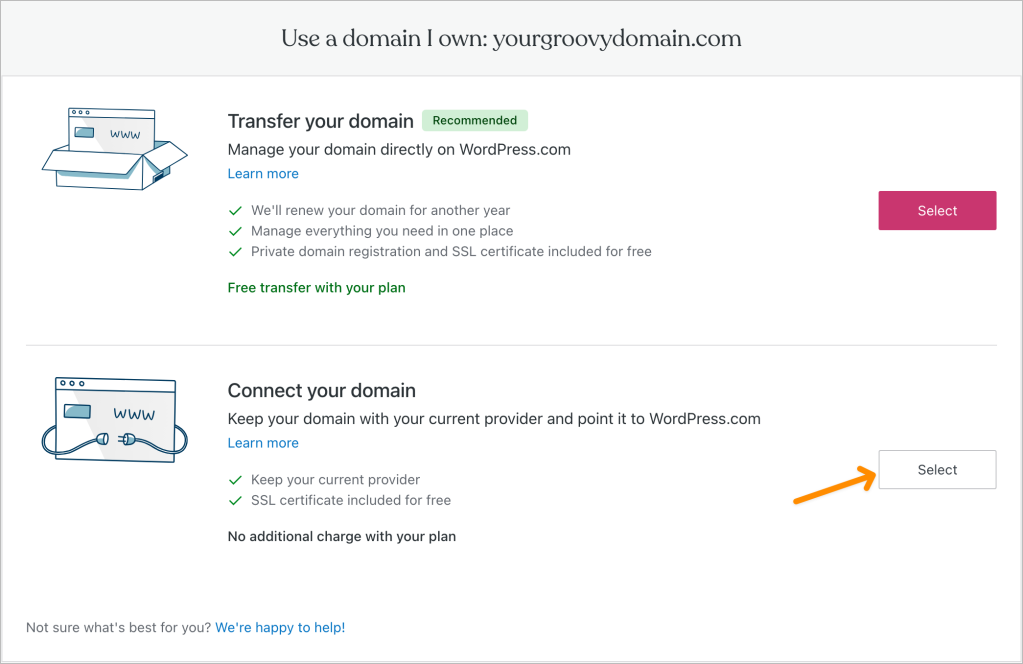
Step 3: Select "Connect your domain"
After you click "Continue" you will have two options to choose from. Click the “Select” button next to “Connect your domain“. It may take a few moments to be redirected to the next screen.
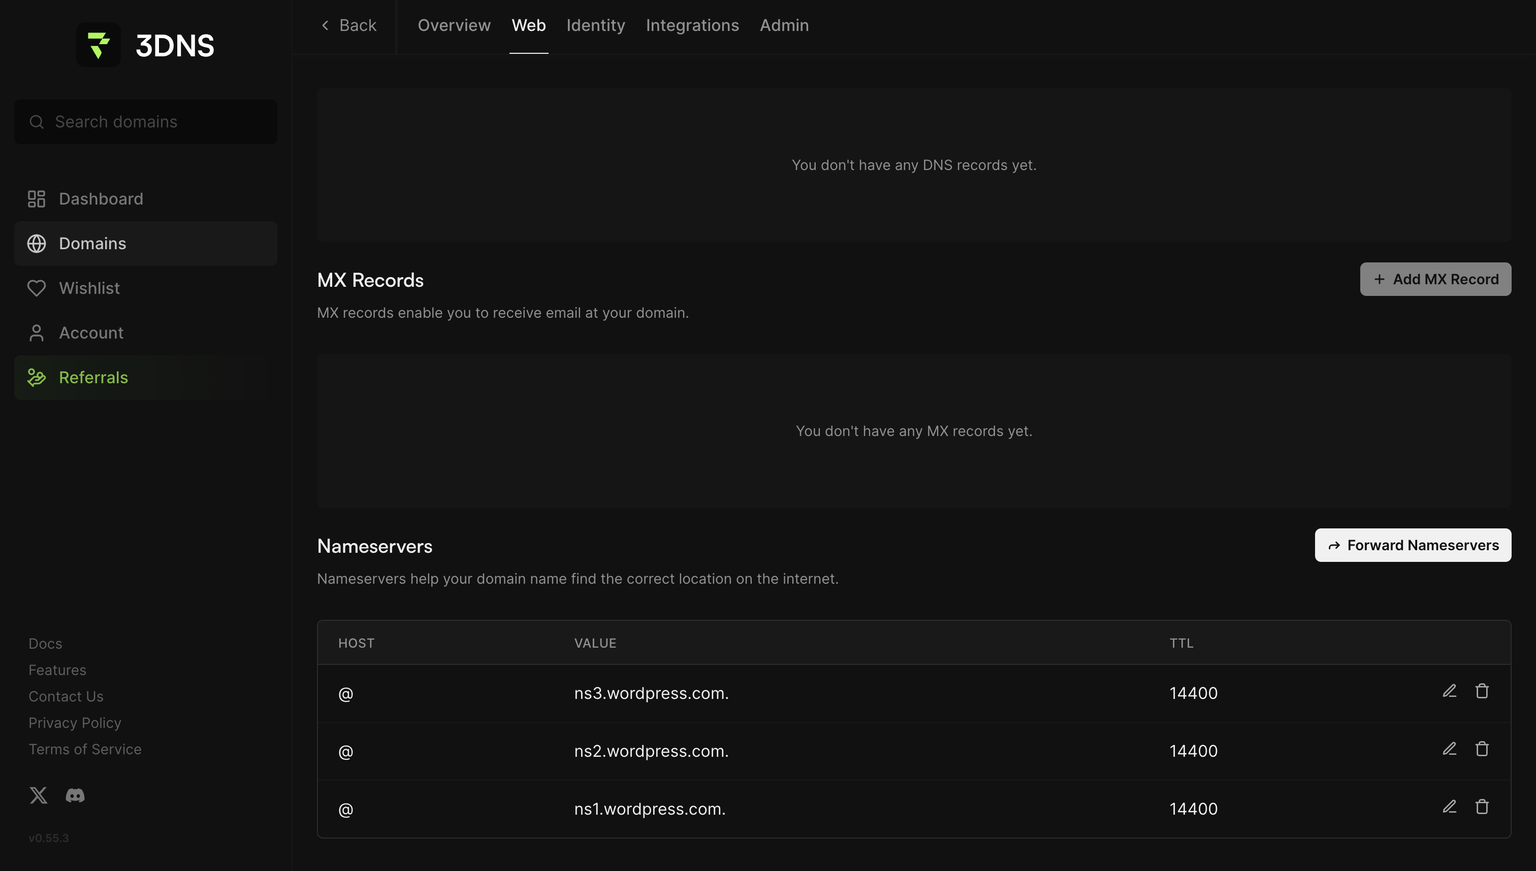
Step 4: Update your nameserver
Copy the following nameservers and paste them into your 3DNS "web" tab under "Nameserver Forwarding" and make sure to add those values to your 3DNS domain
ns1.wordpress.com
ns2.wordpress.com
ns3.wordpress.com
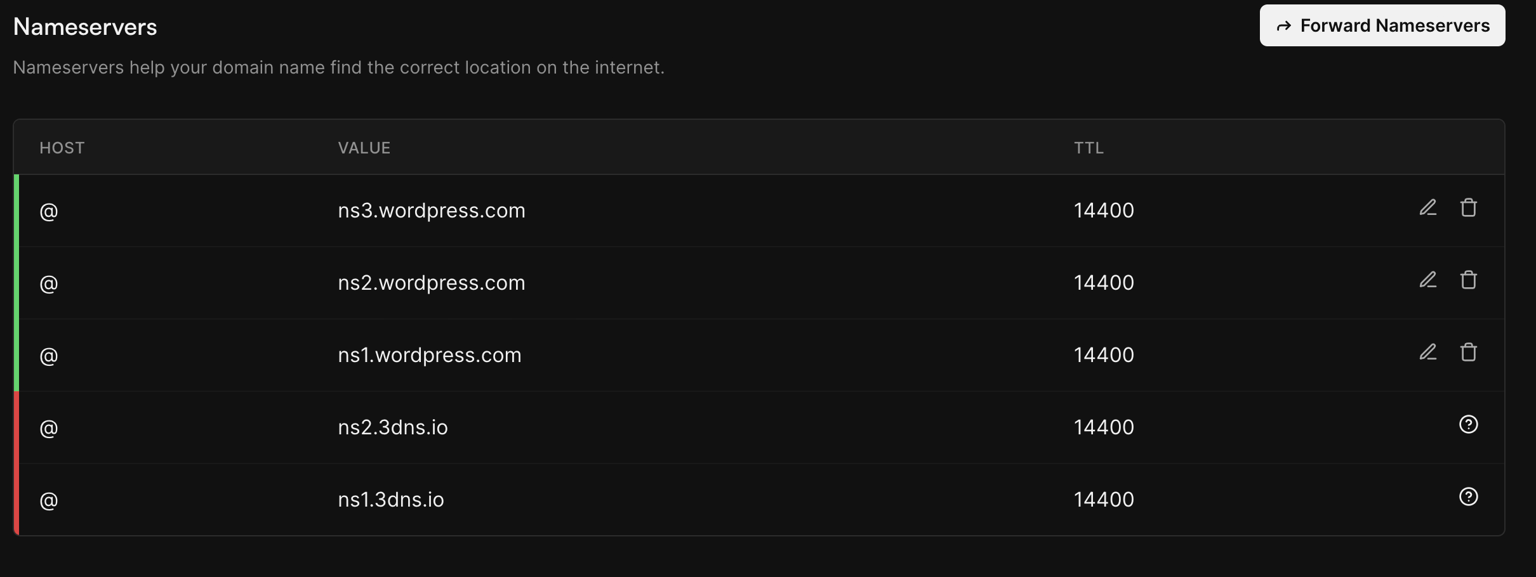
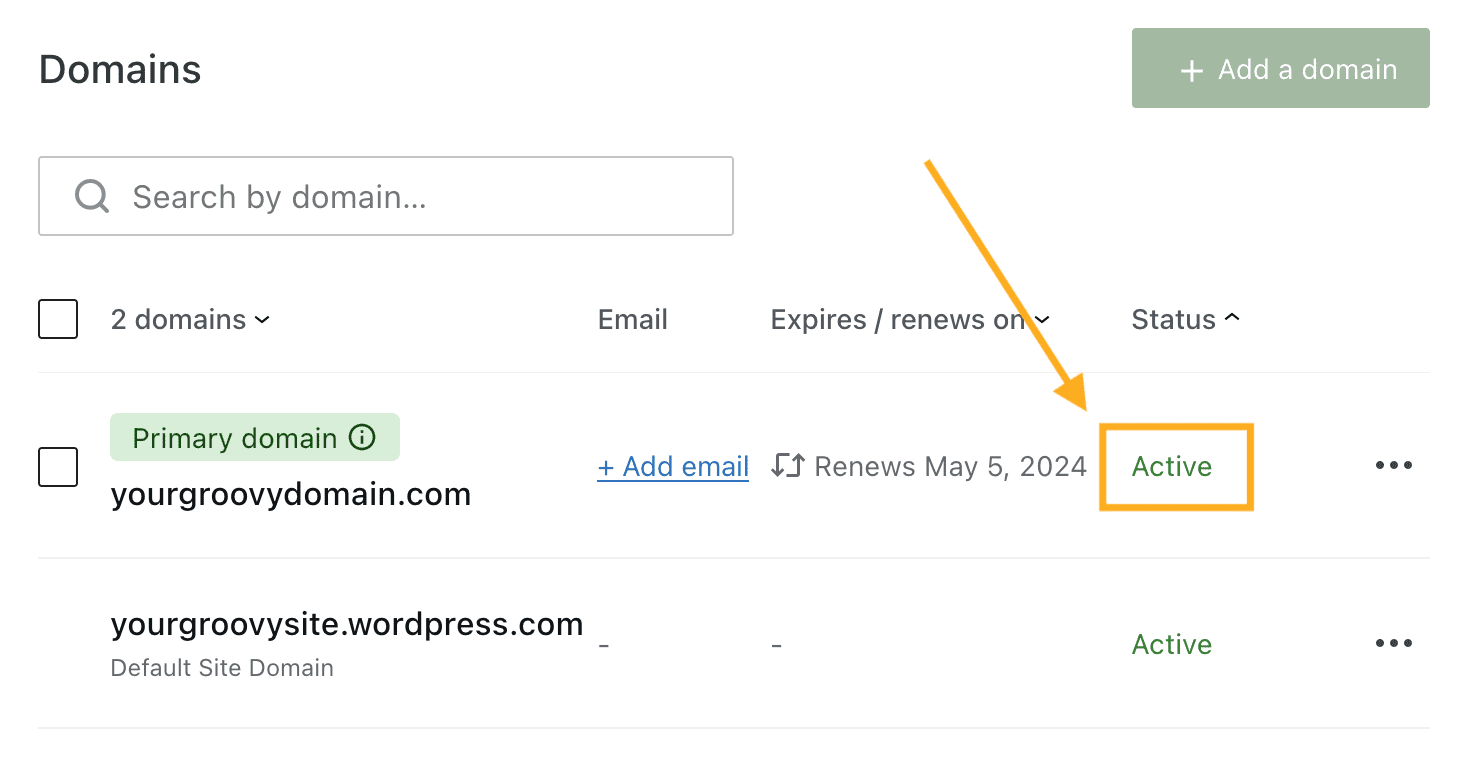
Step 5: Click " Apply Updates" and sign the transaction. Once the update is complete, your page should look like this.
Step 6: All you need to do now is wait for the changes to reflect on your wordpress dashboard
Updated about 2 years ago