How to Transfer a Domain from Namecheap to 3DNS
This guide provides a detailed step-by-step process to successfully transfer your domain from Namecheap to 3DNS, converting it into an on-chain domain.
Transfer a Domain from Namecheap to 3DNS
Ensure your domain is ready for transfer by confirming:
Before You Begin:
The domain is more than 60 days old.
Remove DNSSEC on your domain.
It hasn't been transferred between registrars in the last 60 days.
The domain is unlocked for transfer (Registrar Lock disabled).
Transferring a Domain from Namecheap to 3DNS
1. Log Into Namecheap: Sign into your account.
Navigate to "Domain List" and click "Manage" next to the domain you're transferring.
2. Unlock Your Domain:
Select the "Sharing & Transfer" tab and locate the "Transfer Out" section. Here, you can unlock your domain.
3. Obtain Auth Code:
In the same section, request your Auth Code, which will be sent to the Registrant email. This email may differ from your account email. Note: You may be asked to provide a reason for transferring the domain.
4. Visit 3DNS: Go to the 3DNS platform (app.3dns.box).
5. Start the Transfer Process:
In the 3DNS dashboard, select the "Transfers" section.
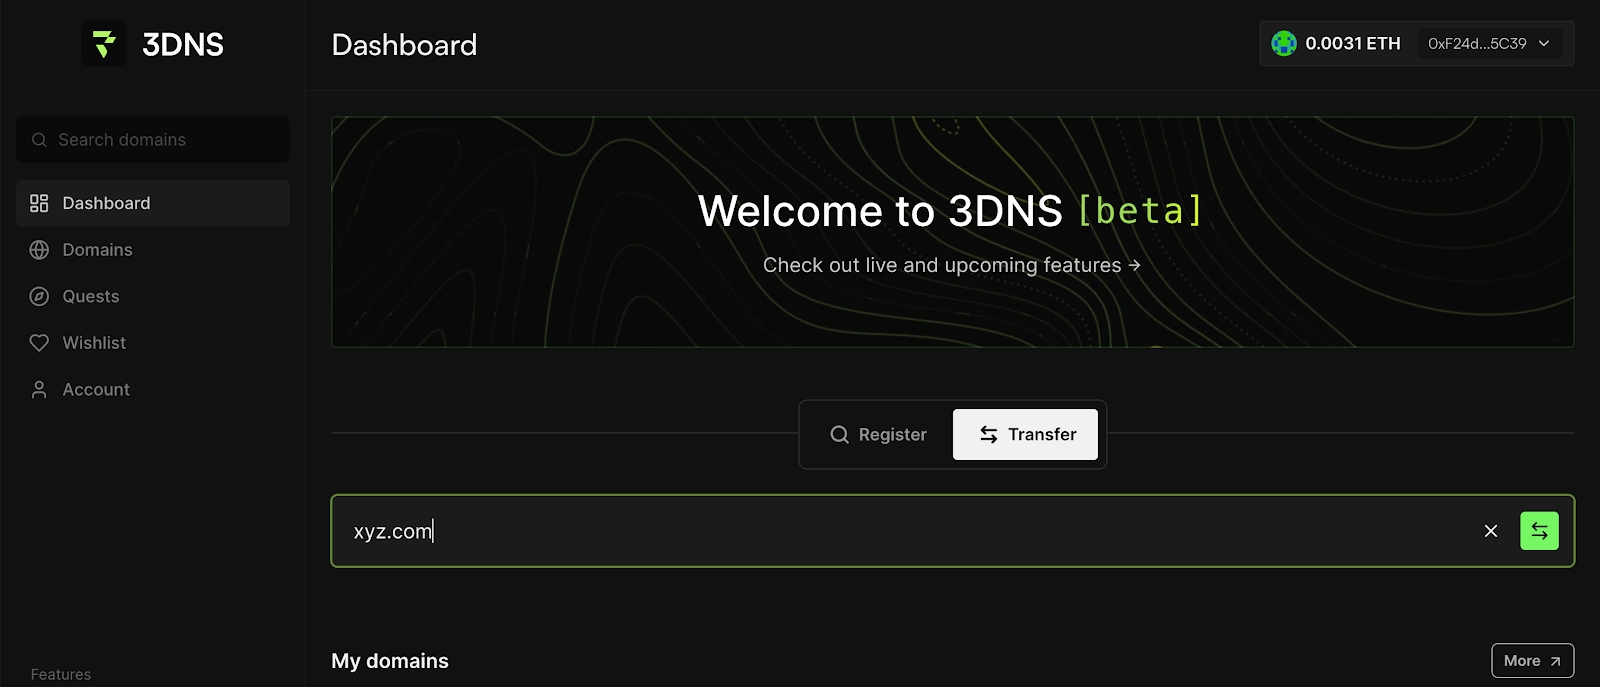
6. Add Your Domain and Checkout:
Enter your domain, add it to the cart, and complete the checkout process.
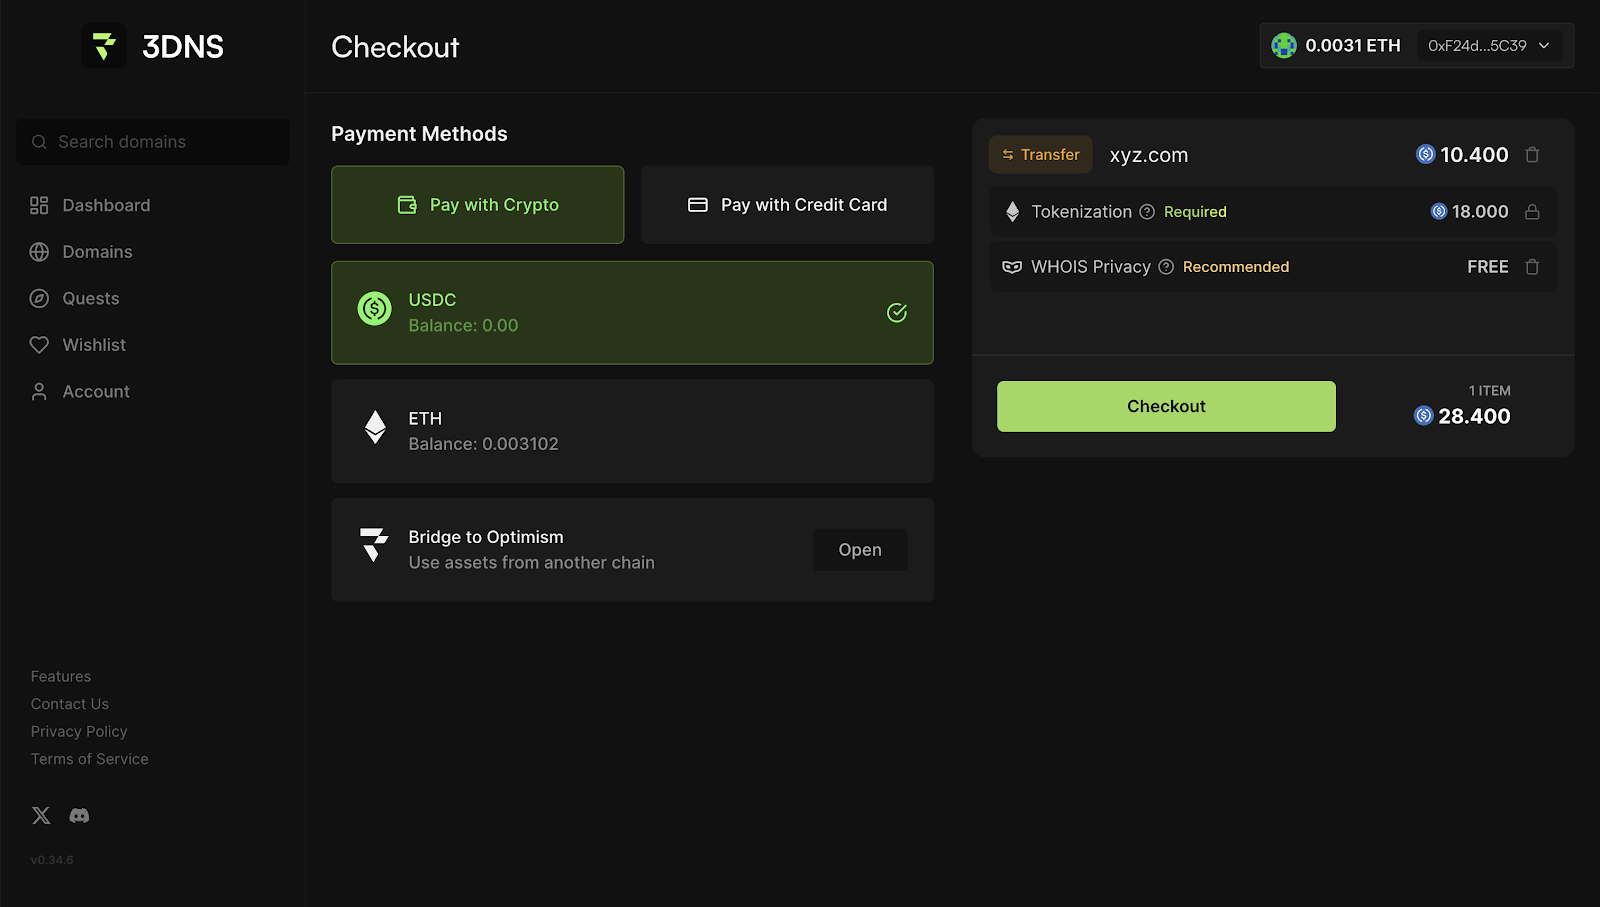
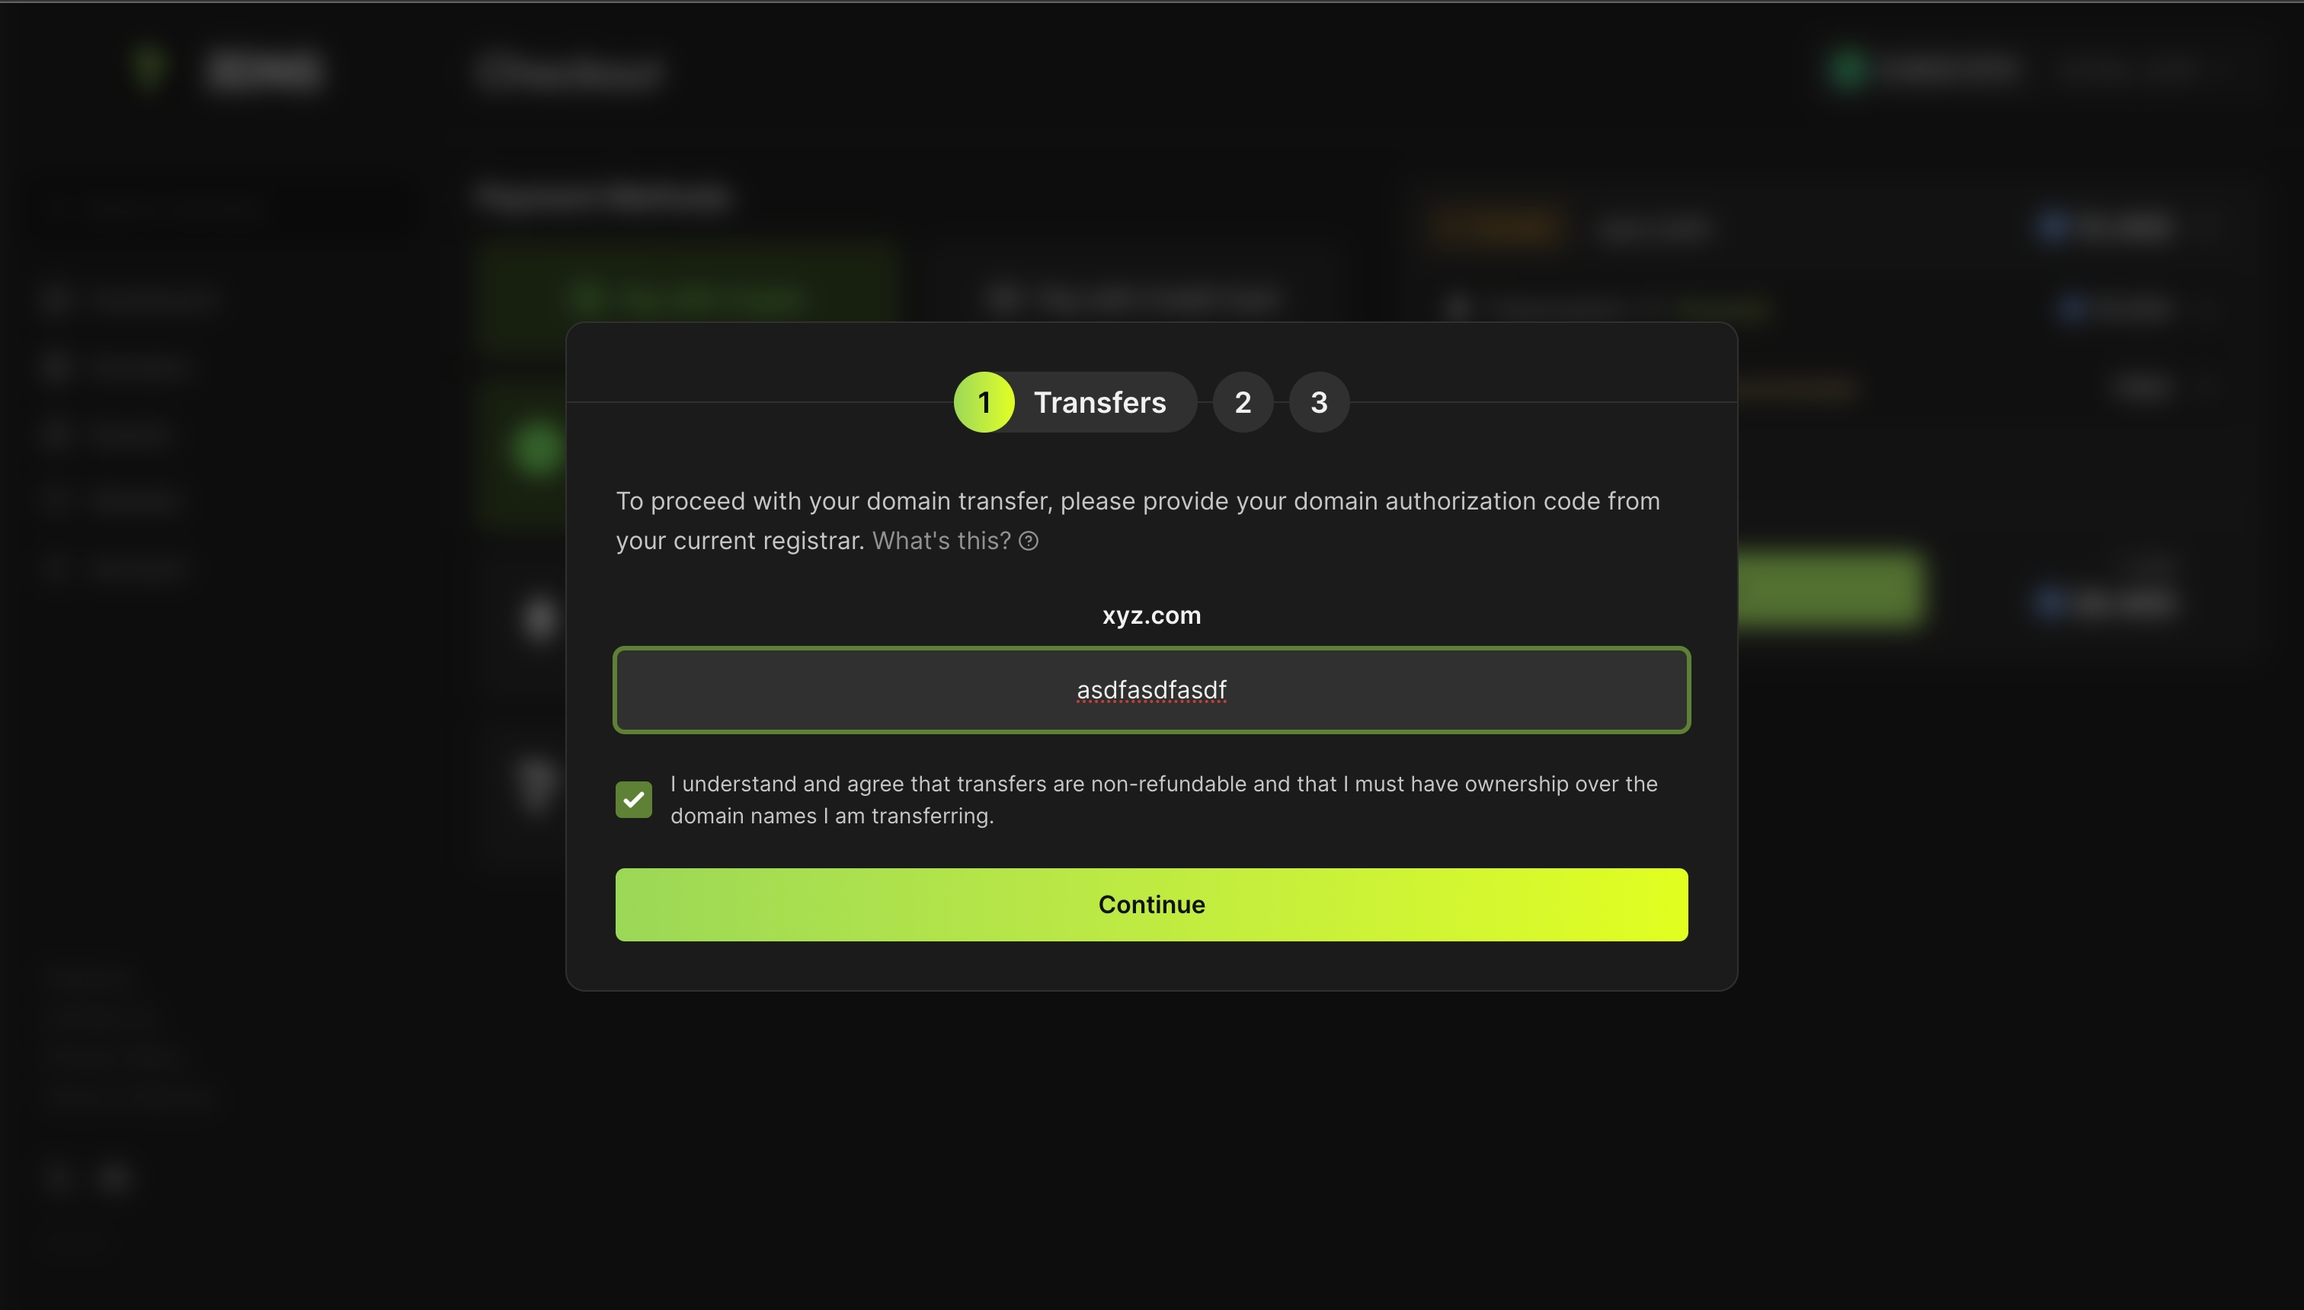
8. Confirm accurate WHOIS information, this is required for all domain transfers.
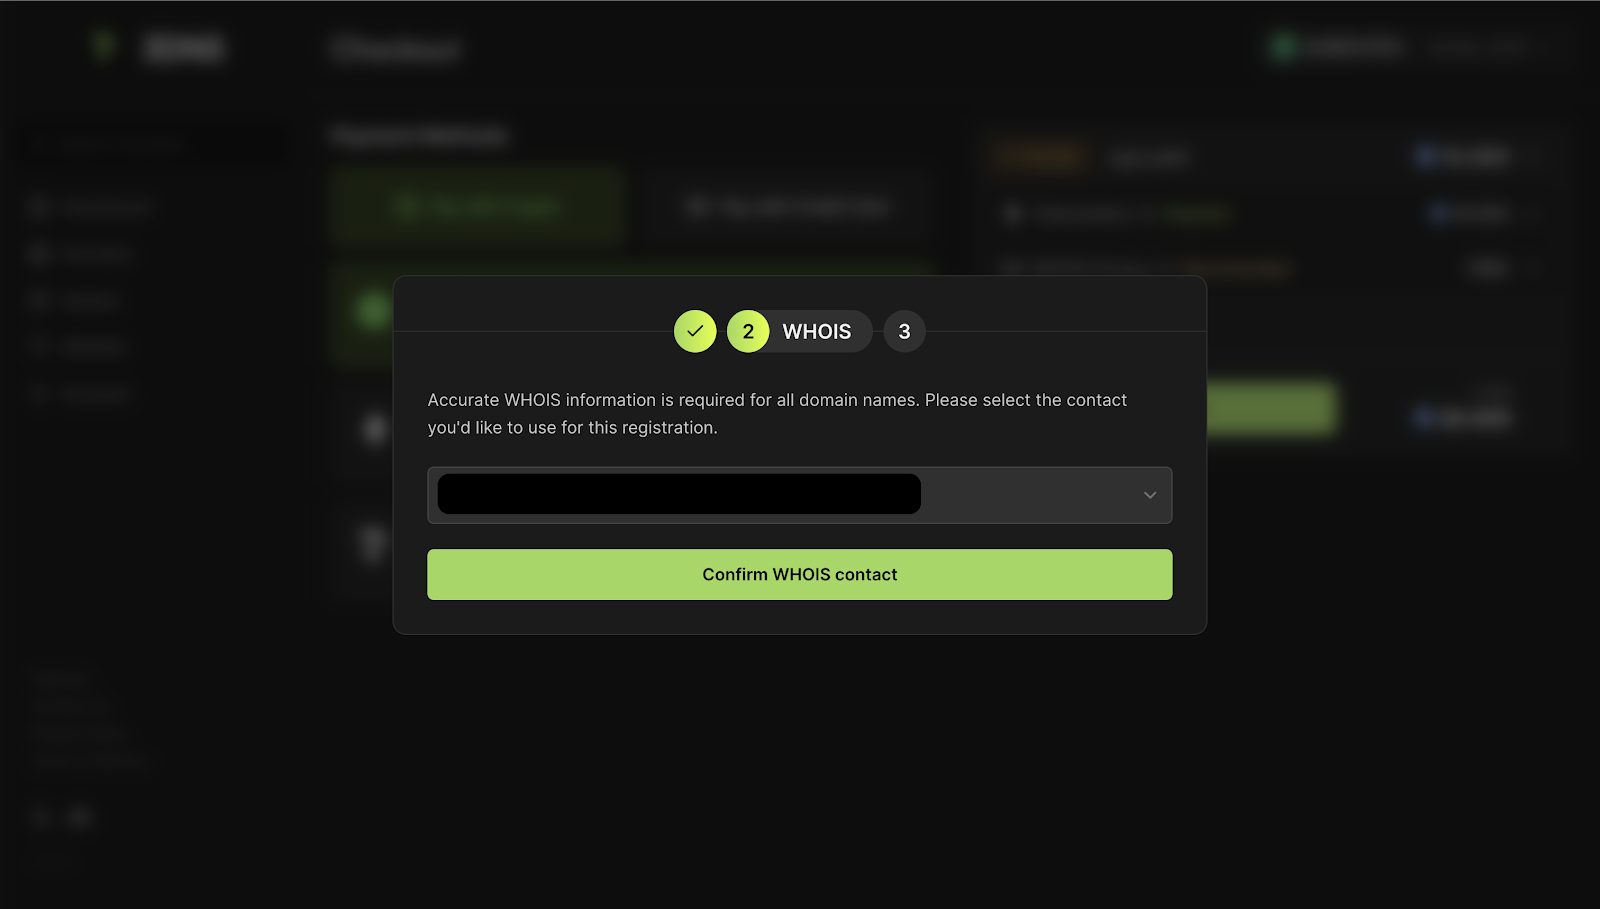
9. Monitor Transfer Status:
Keep an eye on your transfer under Domains > My Transfers. The status will update to "complete" once finished.
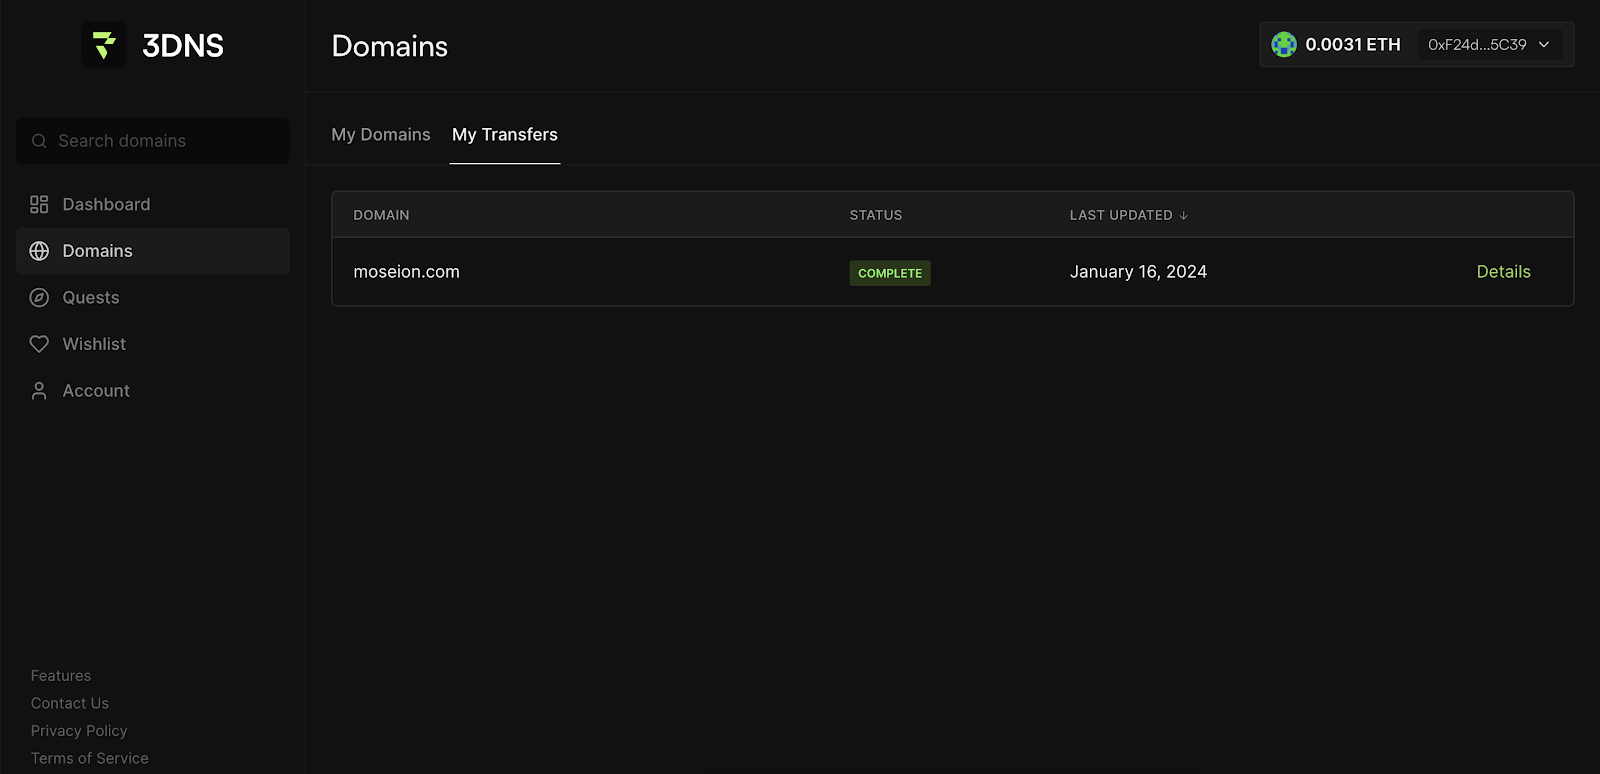
Congratulations, once the transfer is complete, your domain is successfully moved to 3DNS, making it an on-chain domain! 🎉
Updated almost 2 years ago
