

Configuring ENS Records on 3DNS Platform
Learn how to efficiently set up your ENS Records on the 3DNS platform by following our comprehensive, step-by-step guide.
Setting up ENS Records on 3DNS
If you haven't already, make sure that you've purchased a domain from 3DNS.
Here's a Video Overview of Adding ENS records
1. Head over to your domains tab, and click the domain you want to edit
Once you're in the domains tab, click "ENS" from the top section
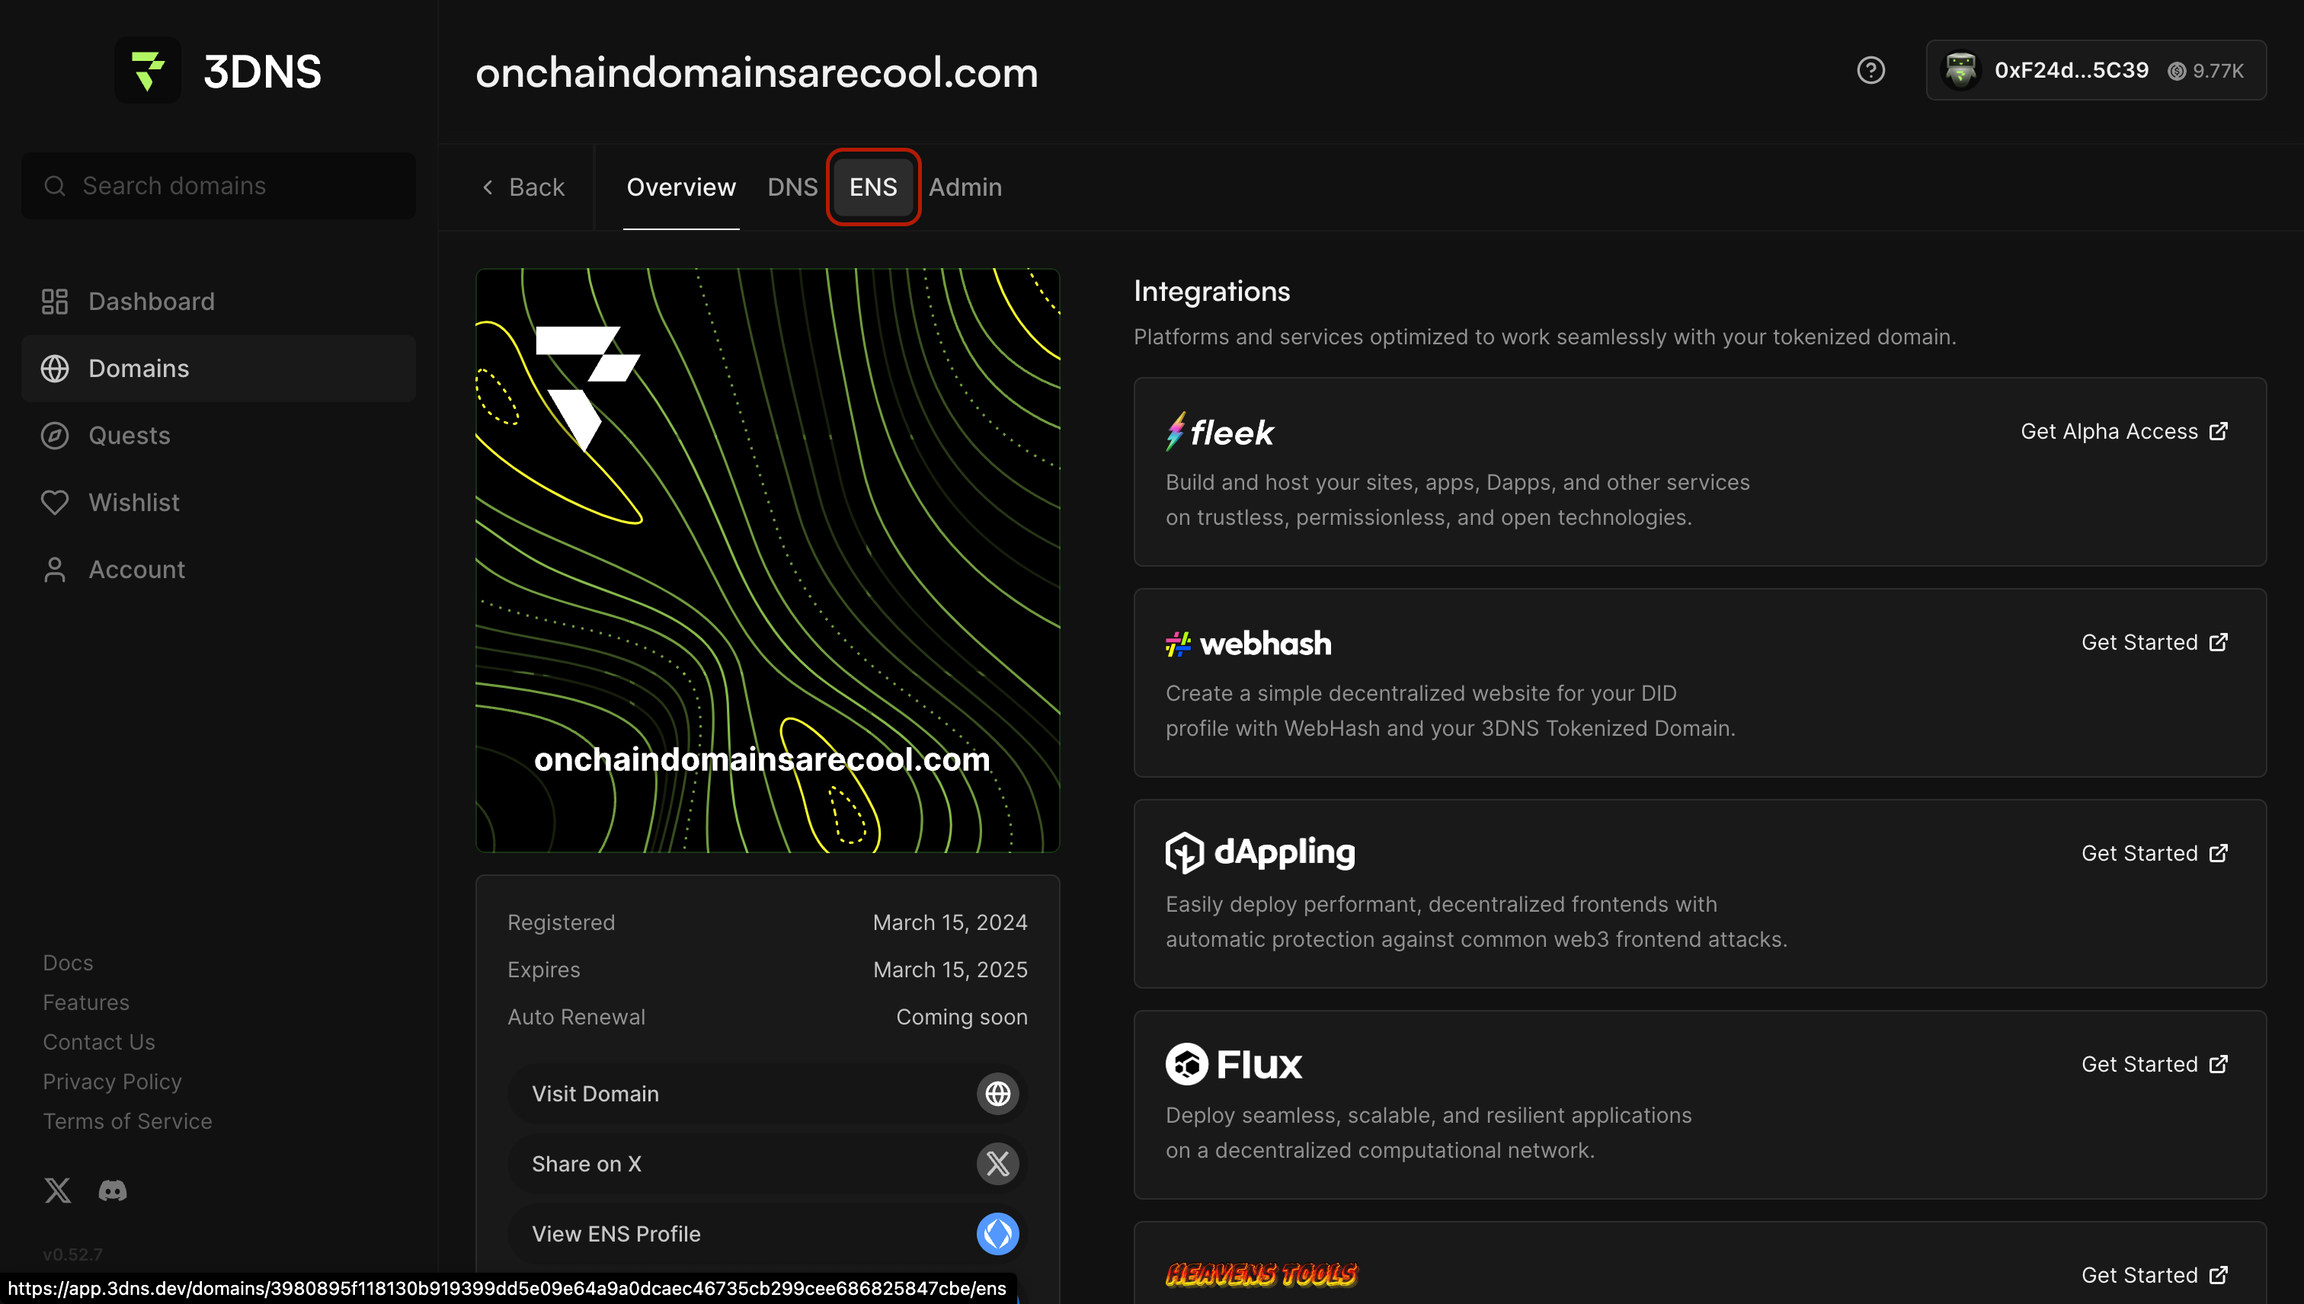
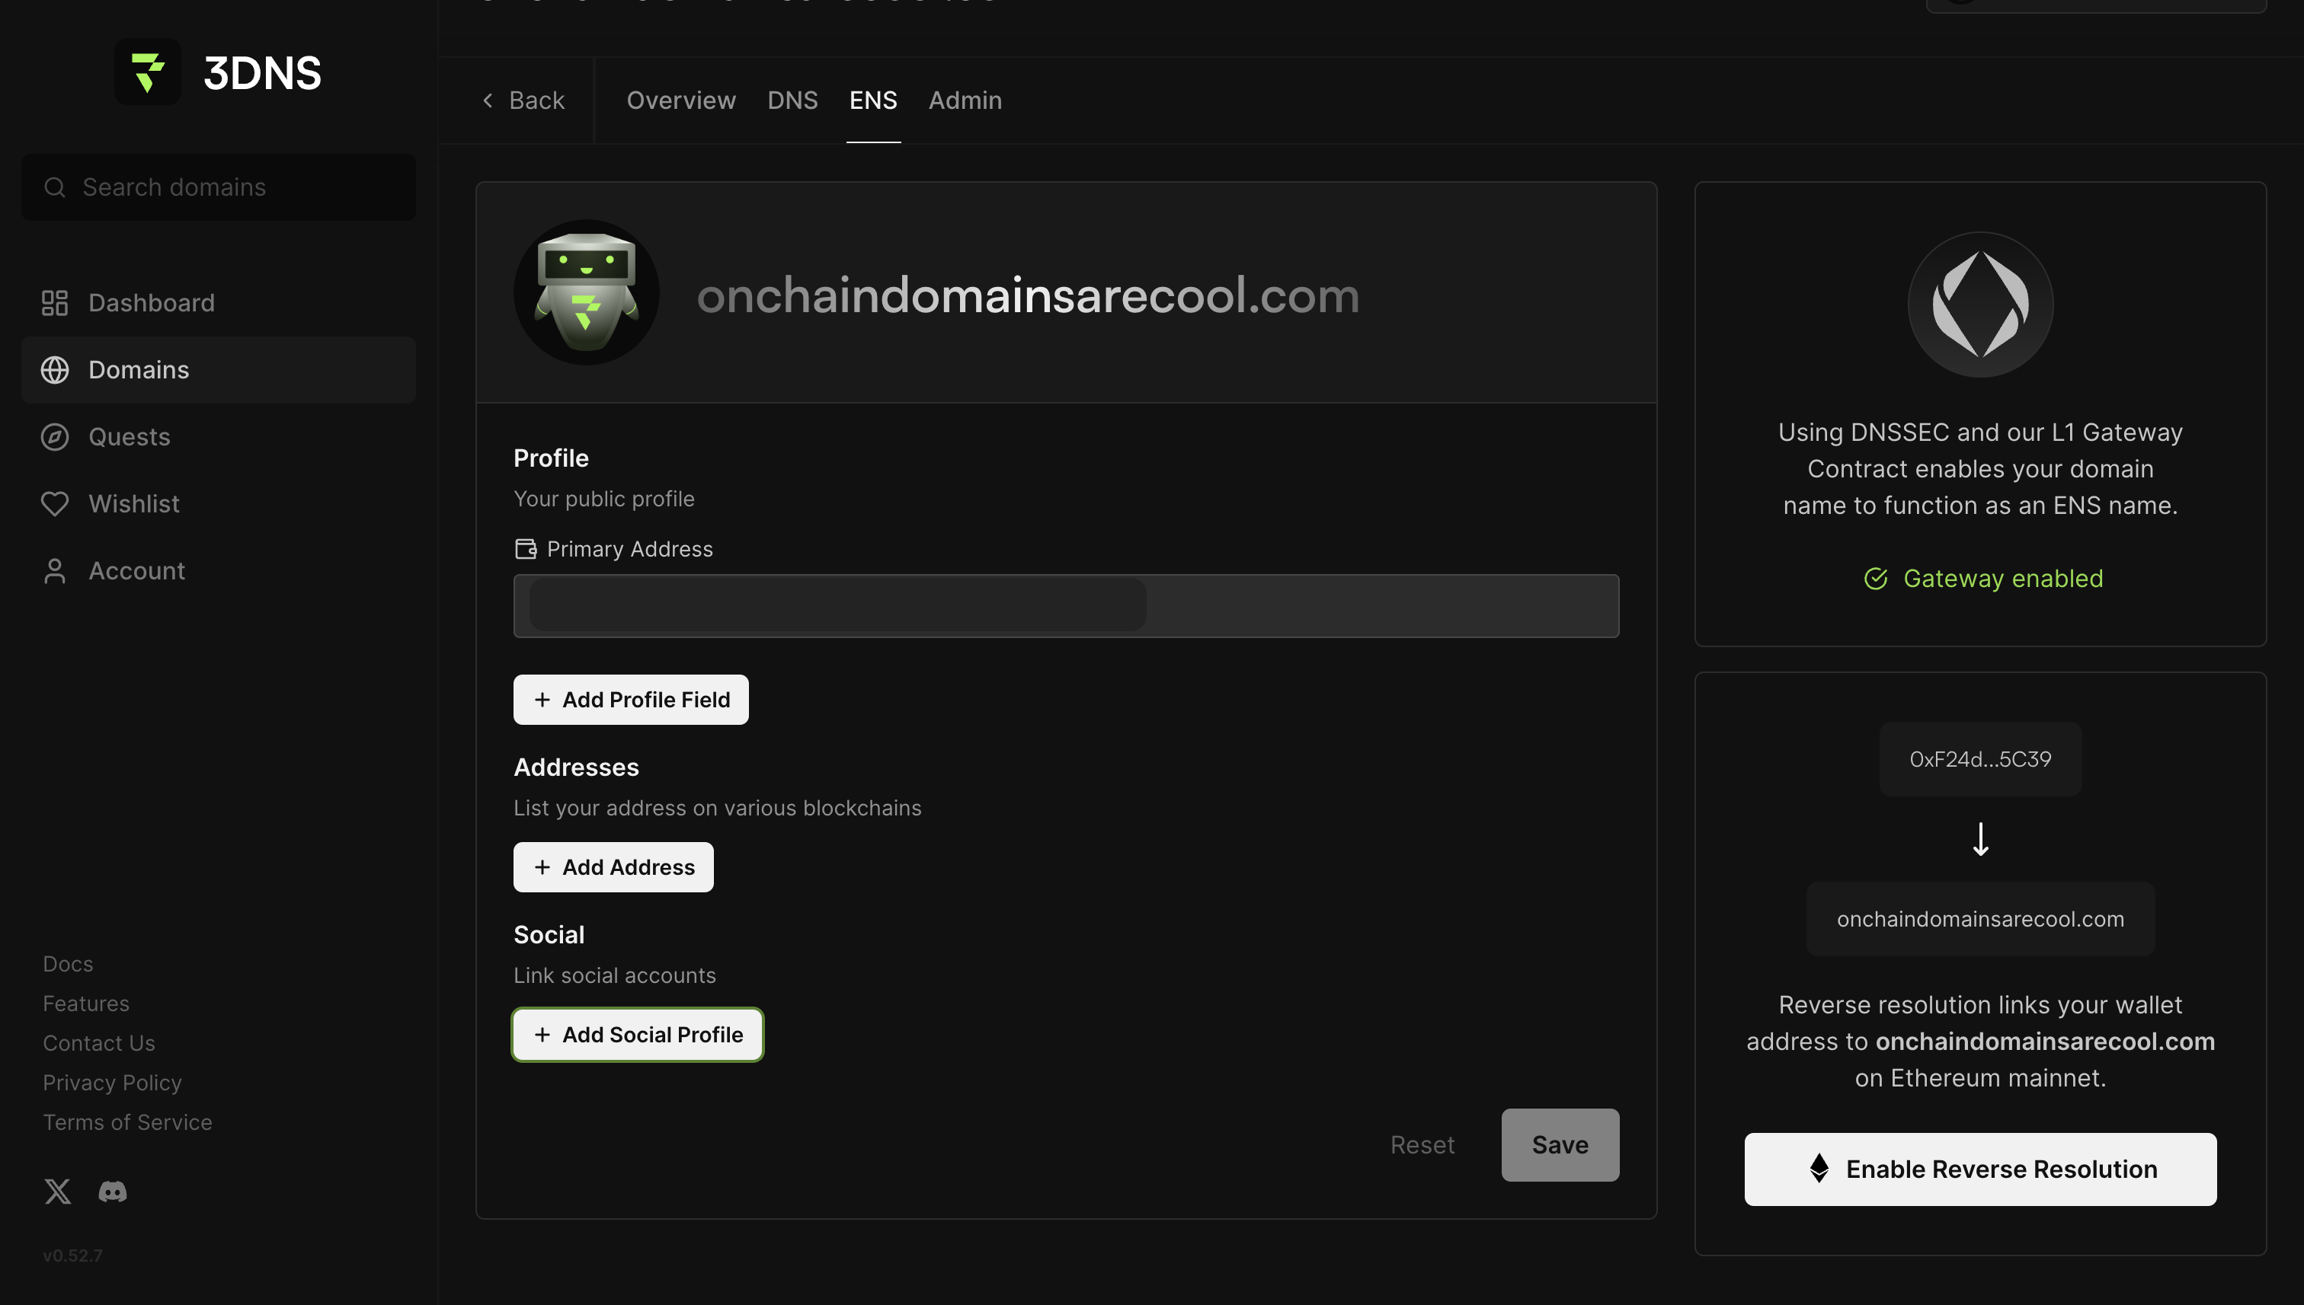
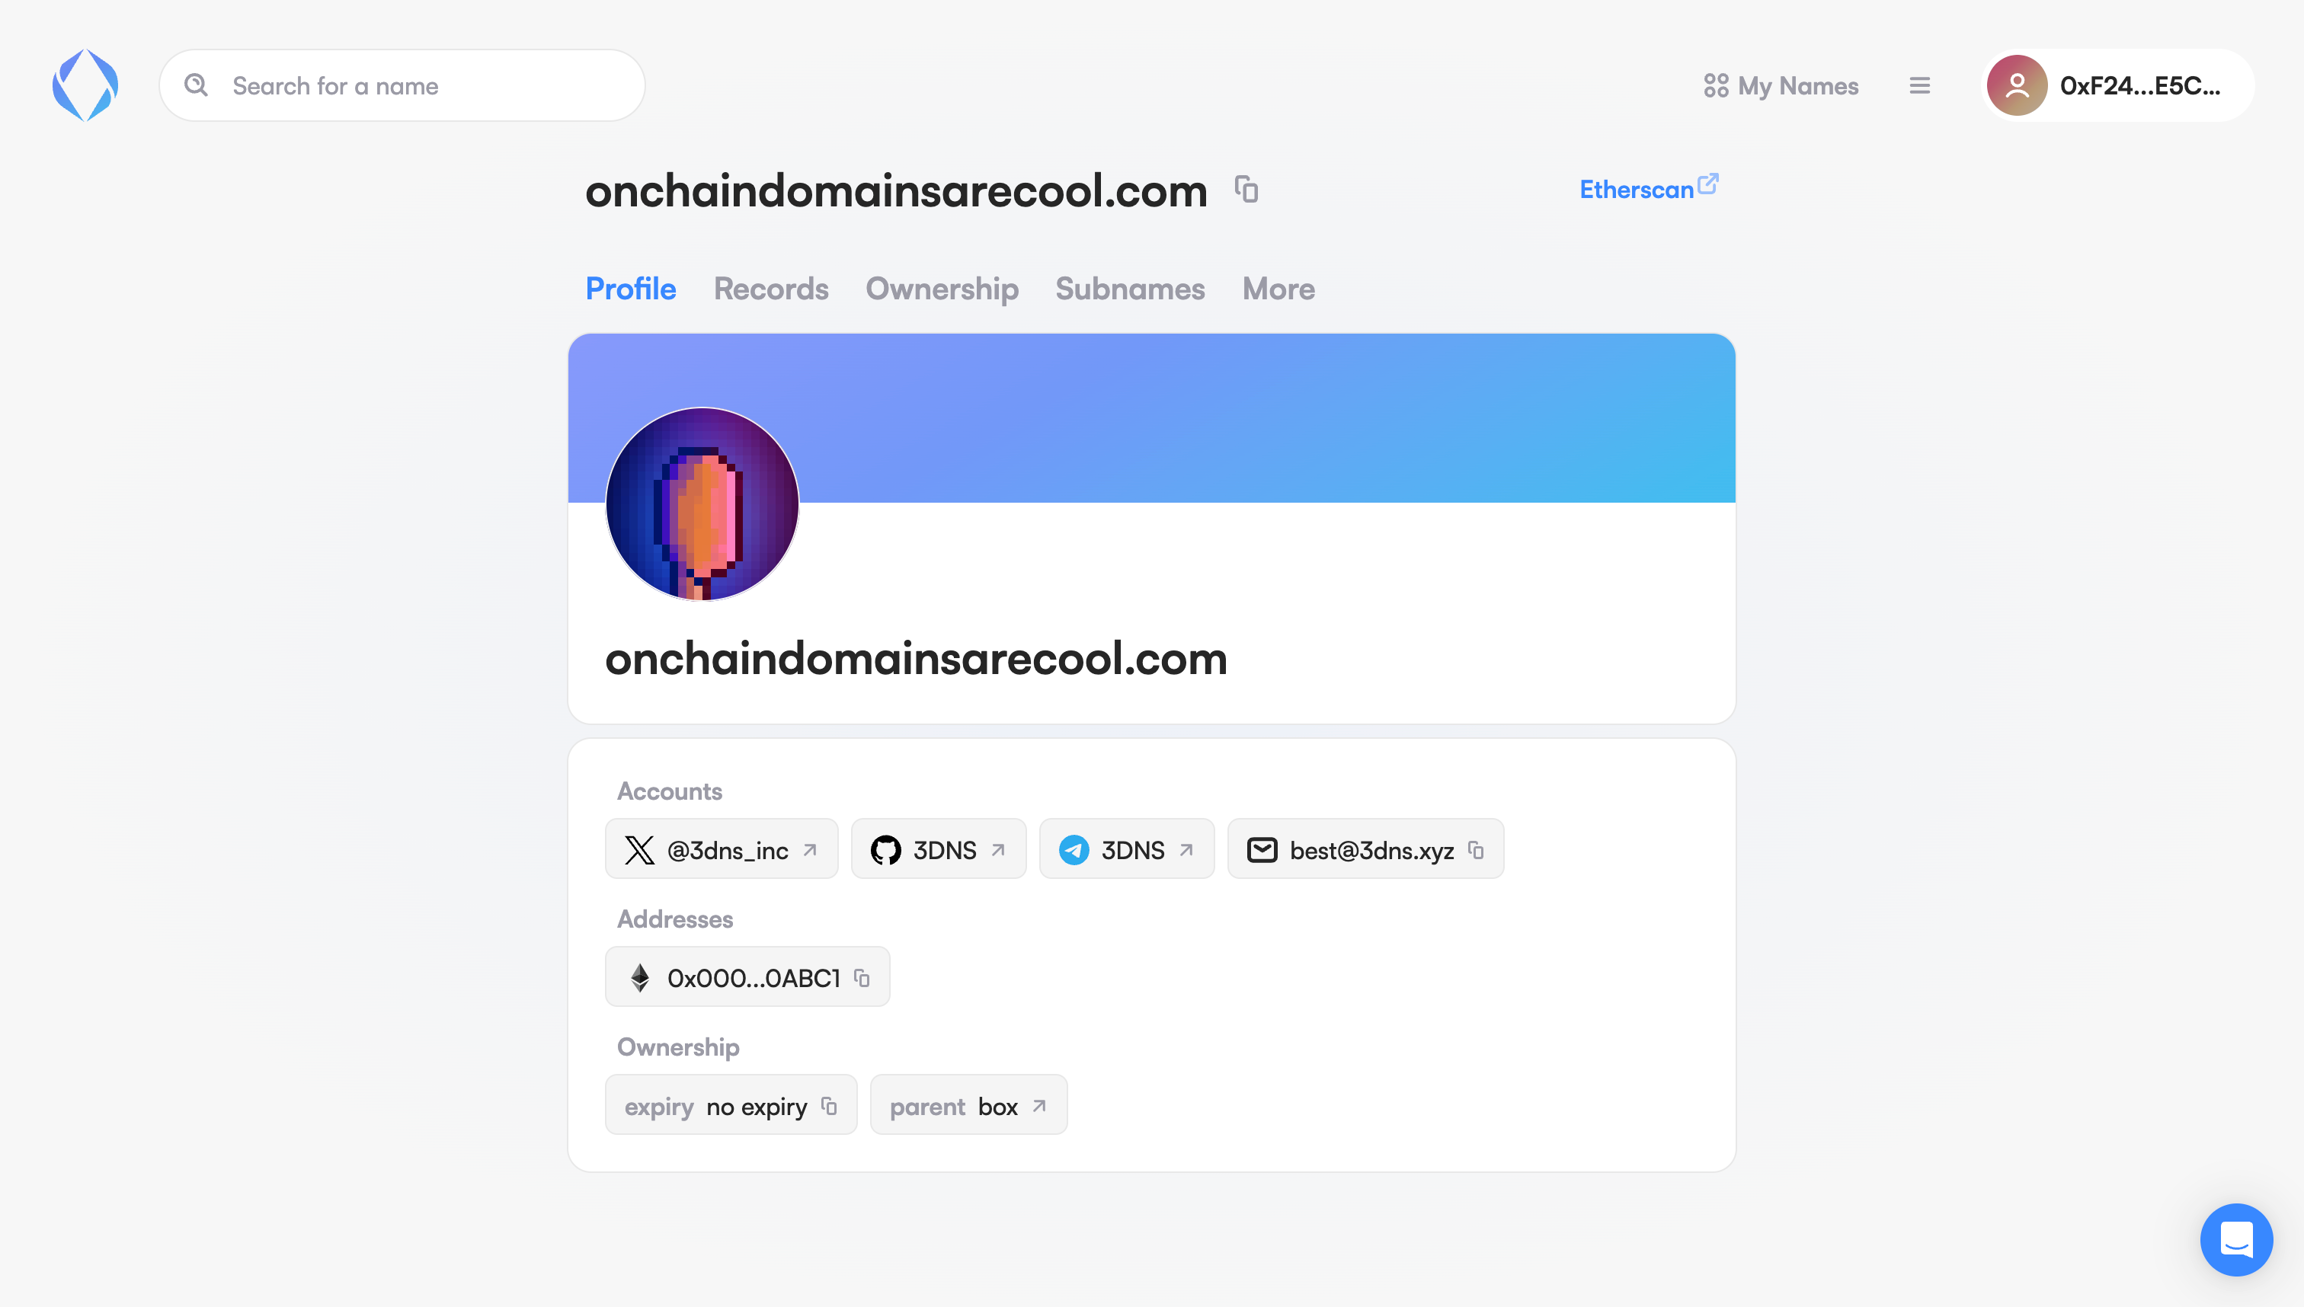
2. This is what your ENS section will look like on 3DNS.
Here, you'll be able to add profile features, crypto addresses for different chains (BTC, SOL, LTC, DOGE, ATOM) and social links.
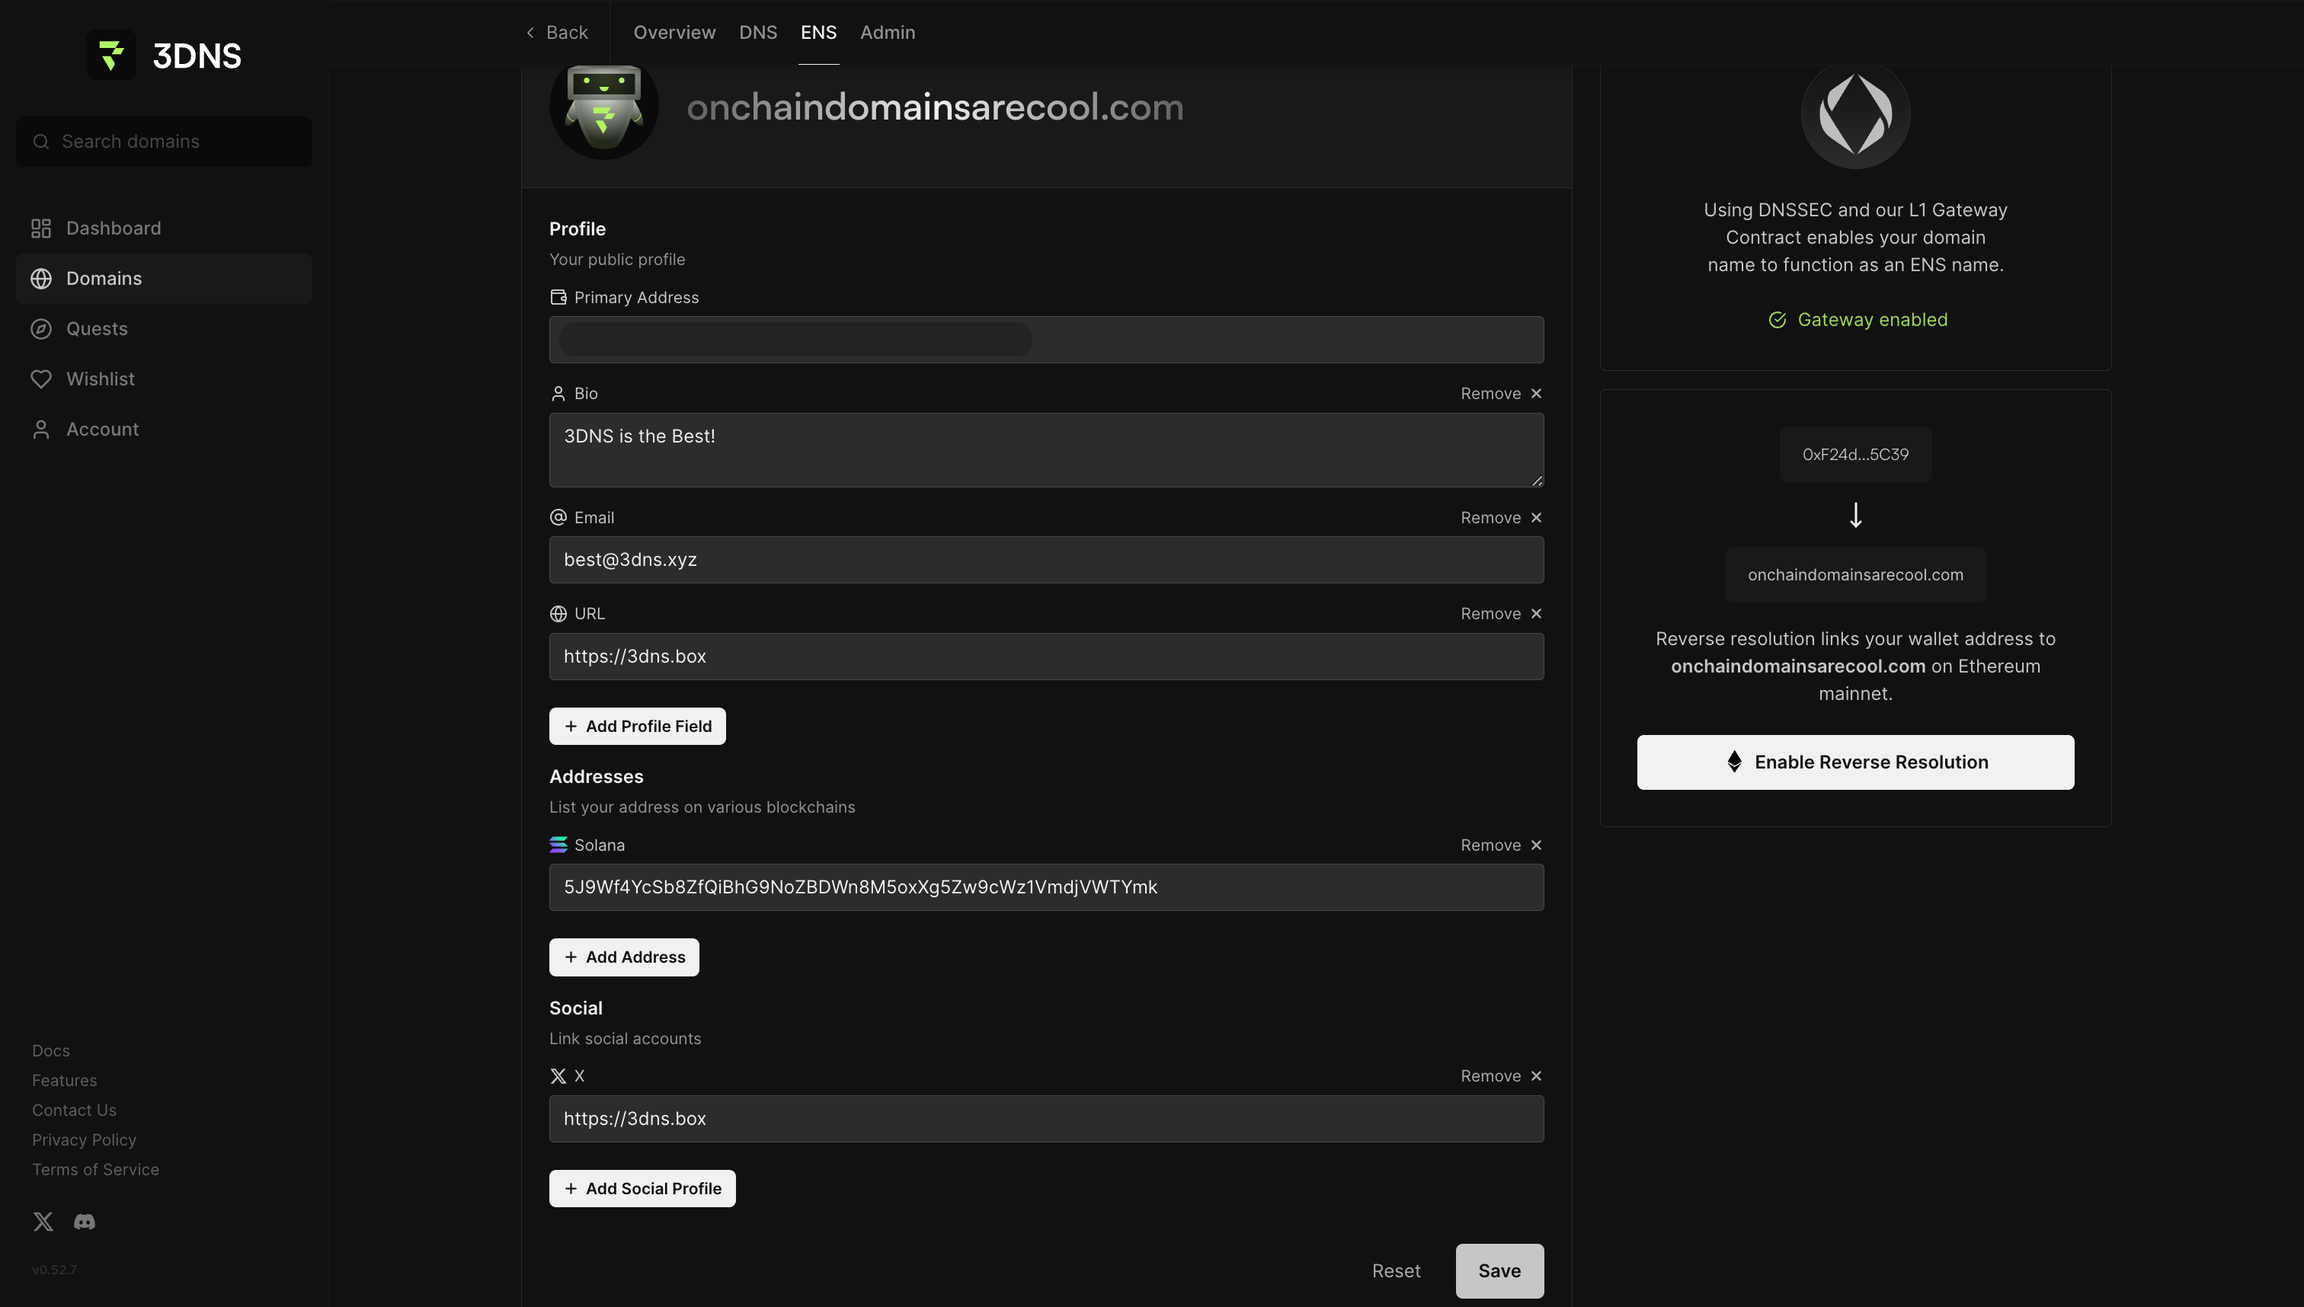
3. Now, fill out your records and click save.
4. Now sign the contract and enjoy your cheap L2 fees!
Once signed, your records will looks like this.
5. If you head over to https://app.ens.domains/yourdomain.com, you'll be able to see your profile on ENS!
Updated almost 2 years ago
Did this page help you?