Proton Mail
Explore a detailed walkthrough to successfully integrate your 3DNS domain with your ProtonMail account for secure and customized email functionality.
How to link your Proton Mail account with your 3DNS domain
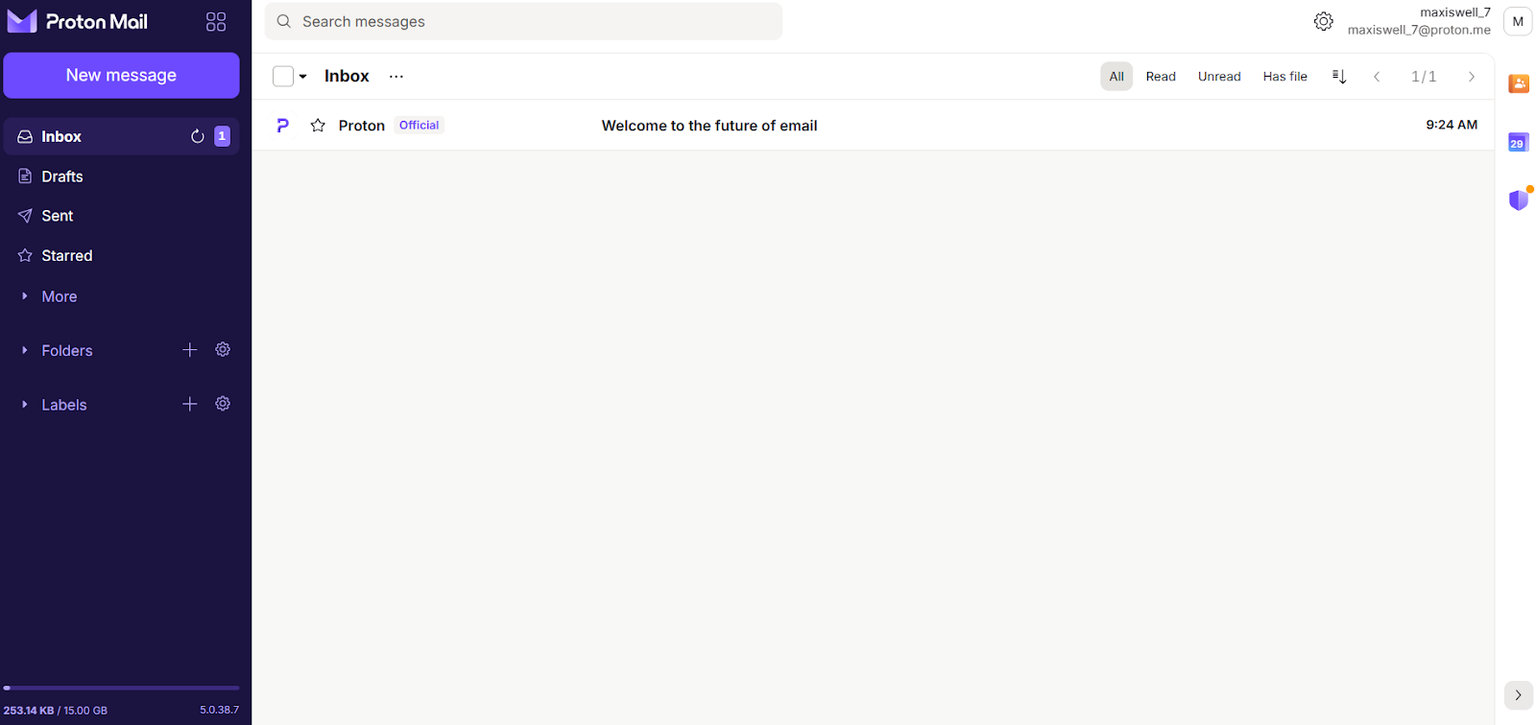
Step 1: Log in to your Proton Mail account and click the "Settings" button, typically found at the top right of the page.
This will allow you to access your DNS settings related to your email account.
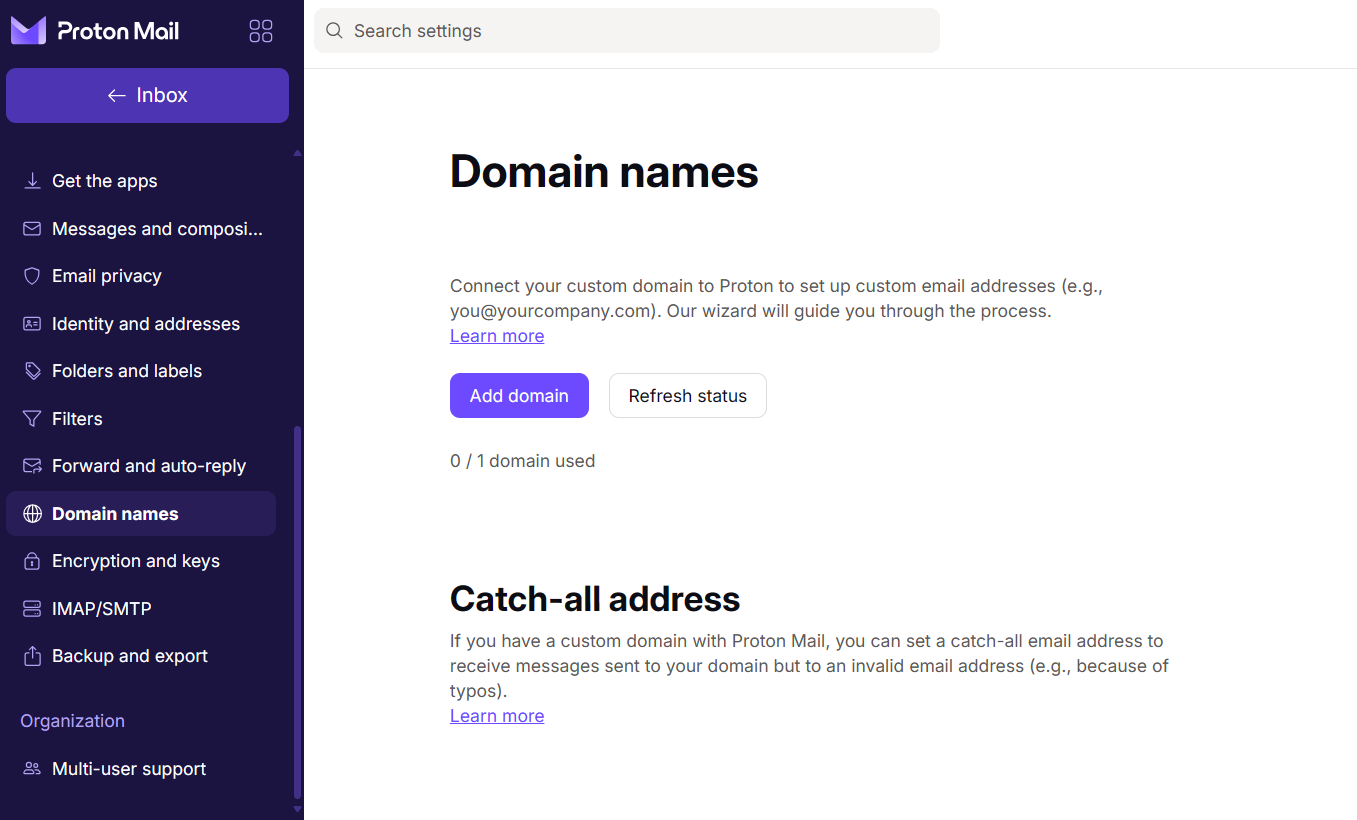
Step 2: Scroll down to the section labeled "Domain Names" and click on "Add Domain."
This will allow you to start the process of integrating your own domain with your Proton Mail account, enabling you to use custom email addresses linked to your domain.
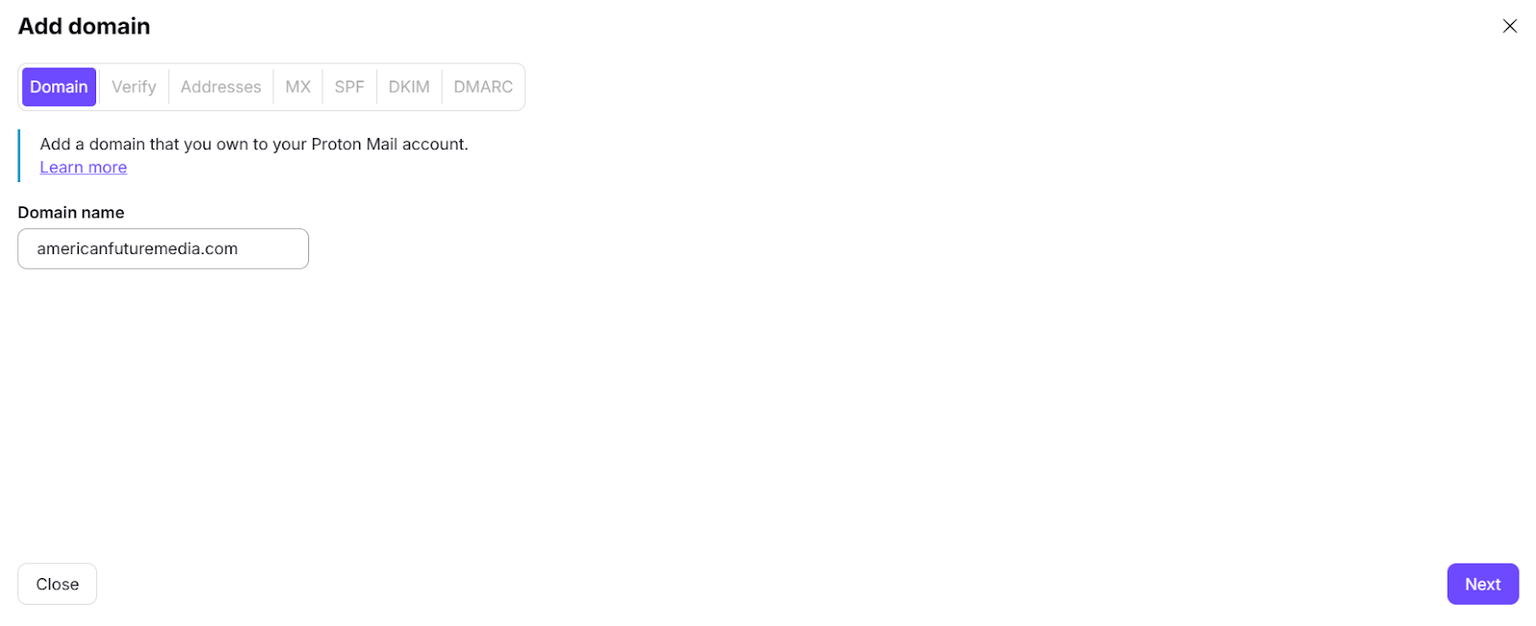
Step 3: Enter the 3DNS domain name you own that you wish to connect with Proton Mail.
This setup will enable you to use your custom domain for sending and receiving emails through your Proton Mail account.
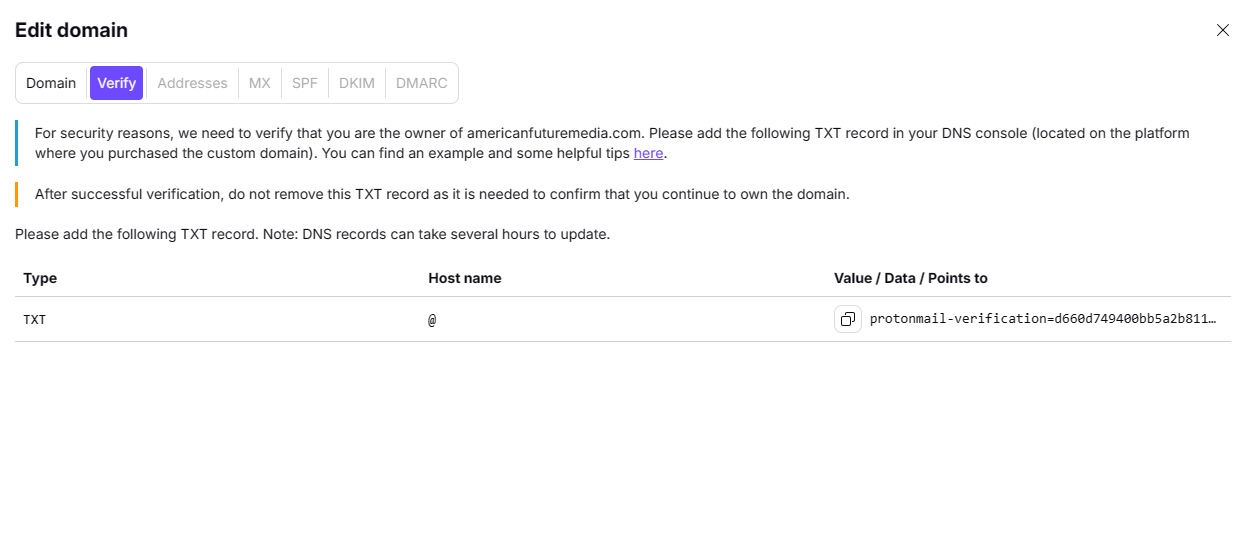
Step 4: Update the TXT records in your 3DNS domain settings using the values provided by Proton Mail.
This is necessary to verify domain ownership and to configure email authentication, which helps prevent spam and spoofing. Follow the instructions provided by Proton Mail carefully to ensure the records are entered correctly.
Step 5: Add the MX (Mail Exchange) records to your 3DNS domain settings as specified by Proton Mail.
These records are crucial for directing your domain's email traffic to Proton Mail servers, ensuring that emails sent to your domain's addresses are correctly received by your Proton Mail account.
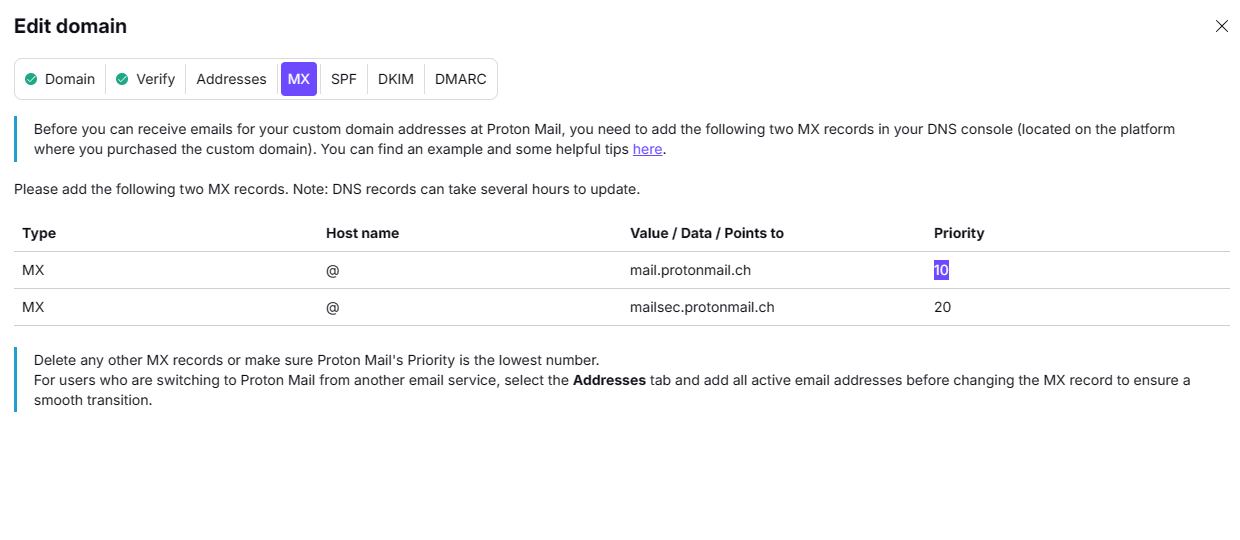
Step 6: Add an SPF (Sender Policy Framework) record to your 3DNS domain settings.
This record is essential for email security; it helps to prevent sender address forgery by specifying which mail servers are permitted to send email on behalf of your domain. Follow the configuration details provided by Proton Mail to set up the SPF record correctly.
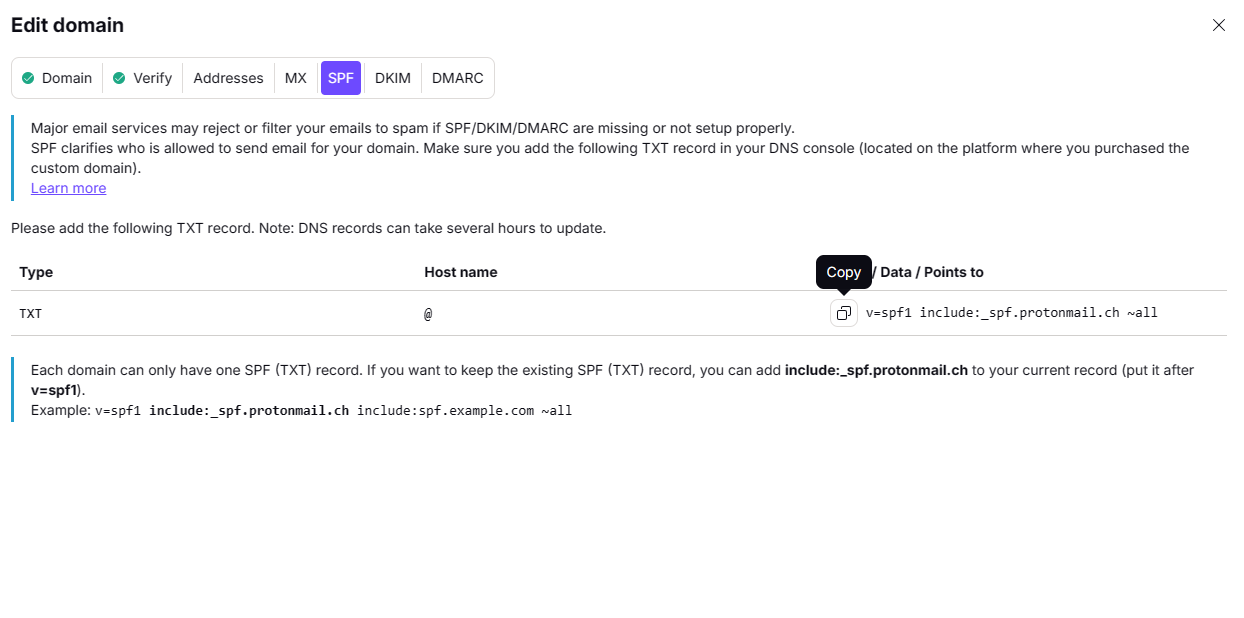
Step 7: Add the CNAME records provided by Proton Mail to your 3DNS domain settings.
These records are necessary for verifying your domain and ensuring that additional email services, like auto-discovery of mail settings, function correctly. Input these CNAME values exactly as Proton Mail instructs to complete the setup.
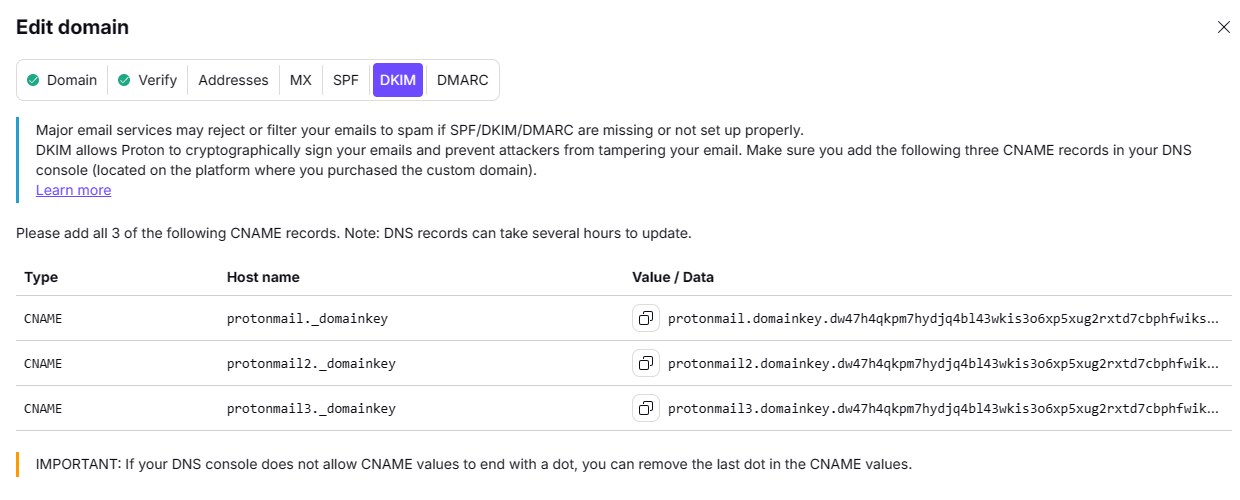
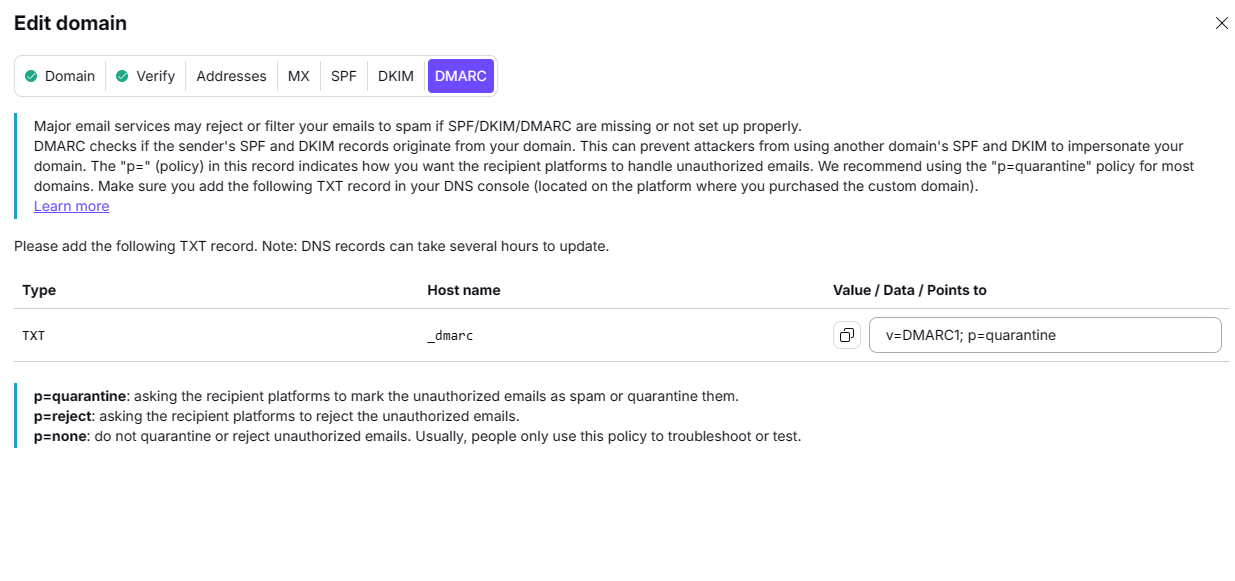
Step 8: Add a DMARC (Domain-based Message Authentication, Reporting, and Conformance) record to your 3DNS domain settings.
This record is essential for email security as it helps to detect and prevent email spoofing. It tells email providers how to handle emails that don’t pass SPF or DKIM checks. Follow Proton Mail’s instructions for the correct values and policies to set up the DMARC record appropriately.
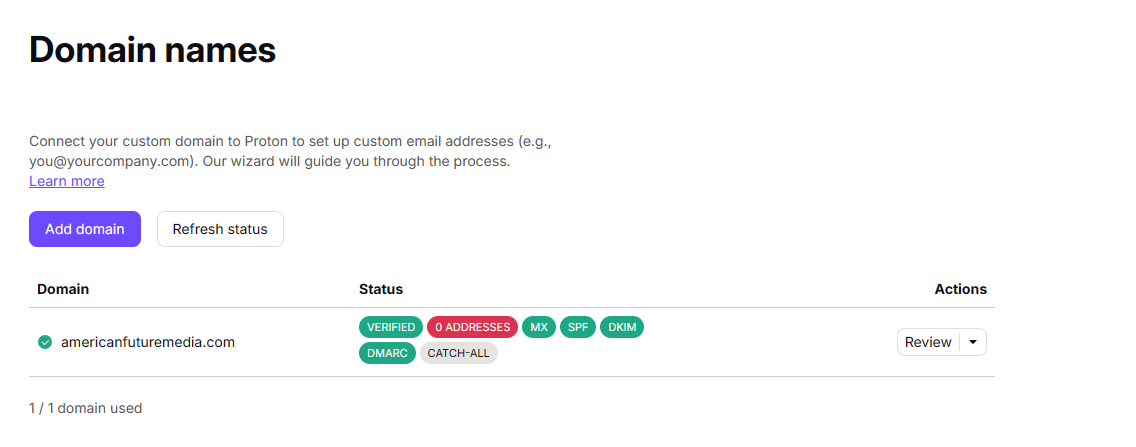
Step 9: Congratulations! Your Proton Mail account is now fully configured with your 3DNS domain.
You have successfully updated your DNS records, including TXT, MX, SPF, CNAME, and DMARC. Your domain is now ready to handle email securely and efficiently through Proton Mail.
Updated almost 2 years ago
