

Guide: Setting Custom Domain on Ghost Using 3DNS
Discover the step-by-step procedure of configuring a custom domain on Ghost via 3DNS.
How to Set Up a Custom Domain on Ghost with 3DNS

Requirements
You must own an onchain domain from 3DNS.
Before you begin, you need to know which DNS records to copy from Ghost before adding them to your 3DNS website. Depending on whether you're using a root domain, subdomain, or non-www subdomain, the records you'll need will vary:
| Root Domain DNS Configuration | ||
|---|---|---|
| Record Type | Host | Value |
CNAME | @ | [subdomain].ghost.io |
A | www | 178.128.137.126 |
| Subdomain DNS Configuration | ||
|---|---|---|
| Record Type | Host | Value |
CNAME | www | [subdomain].ghost.io |
A | @ | 178.128.137.126 |
Non-www Subdomain DNS Configuration
| Subdomain DNS Configuration | ||
|---|---|---|
| Record Type | Host | Value |
CNAME | blog | [subdomain].ghost.io |
Step 1. Update DNS Settings for your 3DNS Domain
Log into the 3DNS app (app.3dns.box)
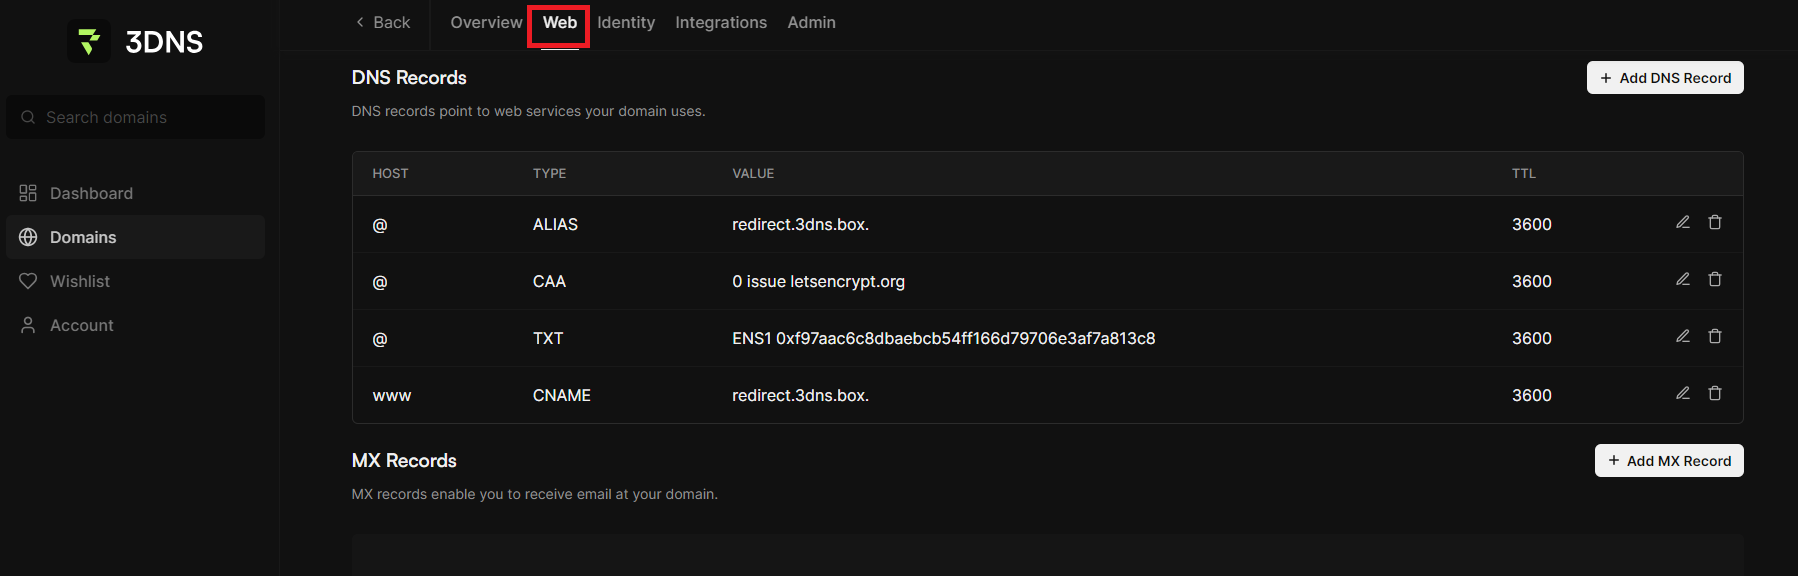
Find and click on the Web tab.
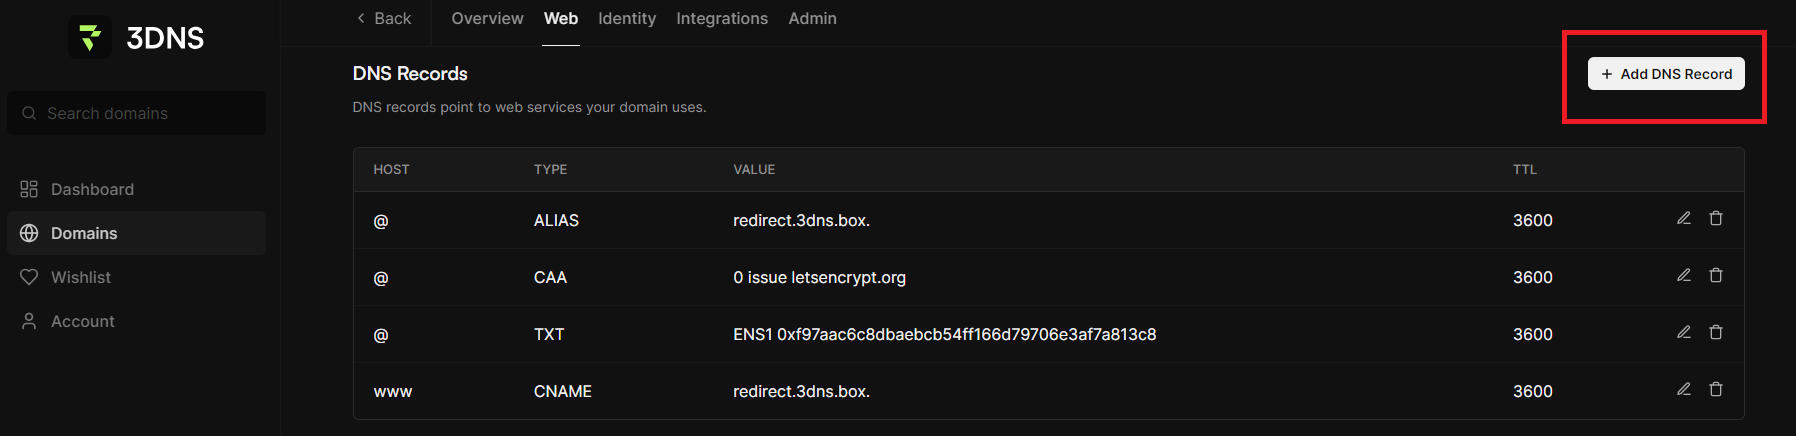
Select Add DNS Record under the DNS Records tab.
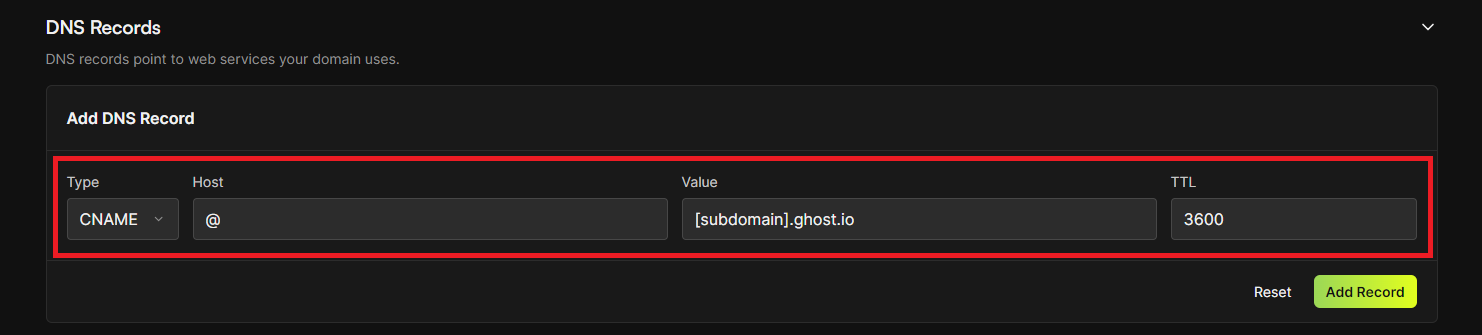
Add the CNAME provided by Ghost, the CNAME differs depending on your domain type.
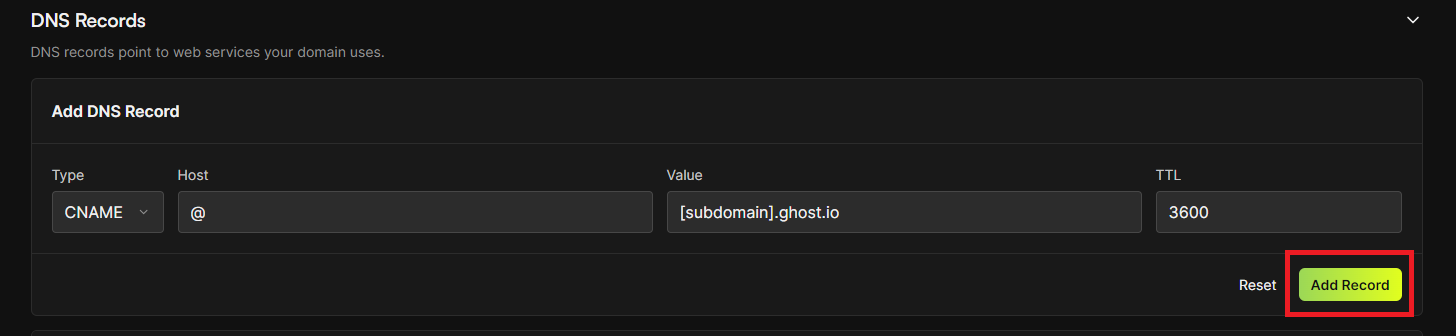
After making the necessary modifications to the DNS records, ensure you select "Add Record" to save the changes.
Step 2. Activate the Custom Domain
Login to your publication’s admin area.
Go to Ghost(Pro) > Domain settings in the admin panel.
Click the “Setup” button.
Enter your custom domain in the designated field.
Click “Activate” to enable your custom domain.
Updated about 2 years ago